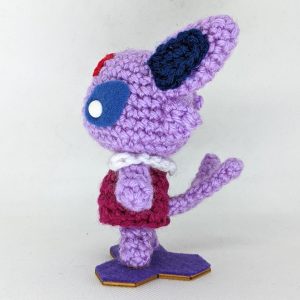
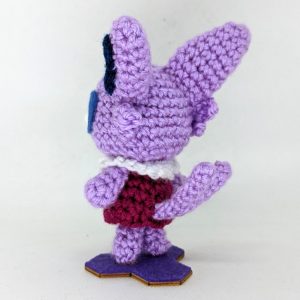
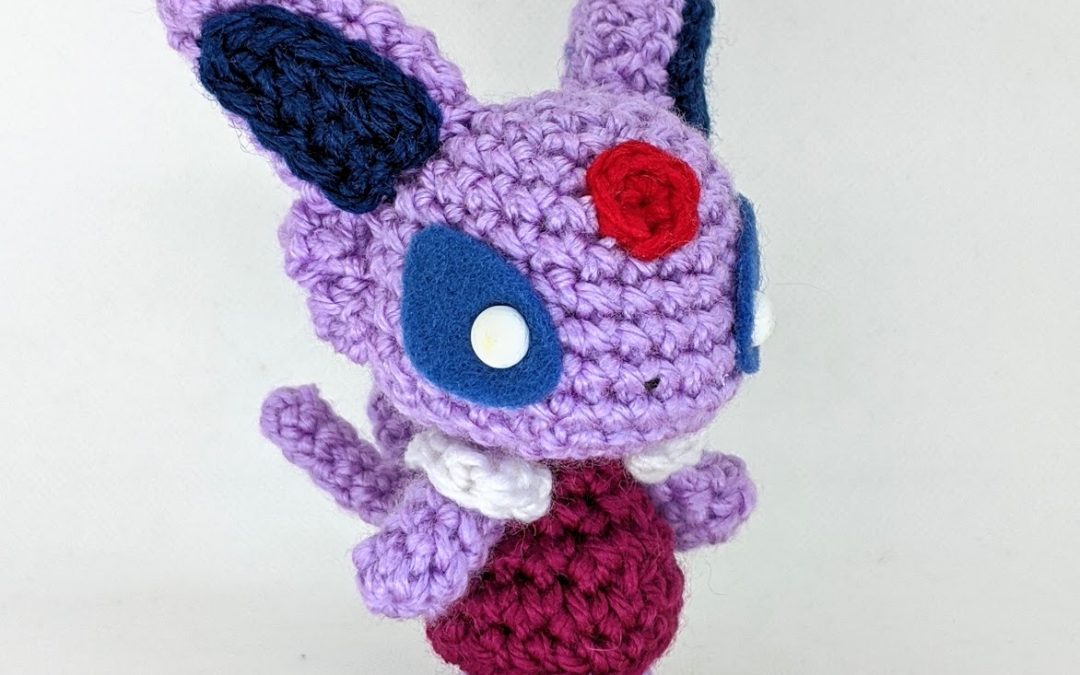
Pokemon and Animal Crossing are my favourite video games and I thought it would be fun to mash the two worlds together. I tried to imagine what Espeon, the psychic-type Eevee evolution, would look like as a villager from Animal Crossing and this is what I came up with.
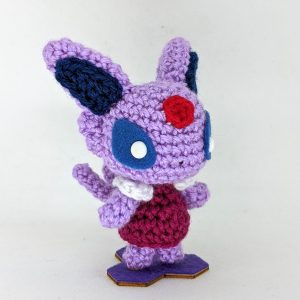
In my mind, Espeon would have the “snooty” personality, obsessed with fashion and not afraid to tell you how tragic your chosen outfit is. She is high-class and enjoys anything luxurious and expensive. Sometimes it’s fun letting your imagination run wild, haha.
The safety eyes that you will mostly find are black as the ones that I use all are. I dipped them in white acrylic paint, stood them up in a piece of foam and let them dry overnight. Since it’s a bit of a pain to pull out the paint every time, I’ll make these in batches of 10 pairs just to have them available.
MATERIALS
Yarns – purple (P) [I used Baby Lilac Bernat Premium], red (R), dark blue (B), fuchsia (F), white (W)
Blue felt
Black yarn or embroidery thread
polyester fibrefill
two 8.0 mm safety eyes painted white
tacky (fabric) glue [I use glue from Aleene’s]
size 8 (5.0 mm) crochet hook [I use hooks from Laurel Hill]
yarn needle [I use the bent tip needles from Clover]
ABBREVIATIONS
ch = chain
st = stitch
sc = single crochet
hdc = half double crochet
sl st = slip stitch
inc = single crochet 2 into the same stitch
dec = decrease over next two stitches (single crochet 2 stitches together or use invisible decrease)
HEAD
R1 With P, sc 6 in magic ring (6)
R2 inc in each st around (12)
R3 (sc 1, inc) six times (18)
R4 (sc 2, inc) six times (24)
R5-7 sc in each st around (24)
R8 (sc 3, inc) six times (30)
R9-10 sc in each st around (30)
R11 (sc 3, dec) six times (24)
R12 (sc 2, dec) six times (18)
R13 (sc 1, dec) six times (12)
R14 dec six times (6)
Finish with a sl st. Cut a long tail for sewing.
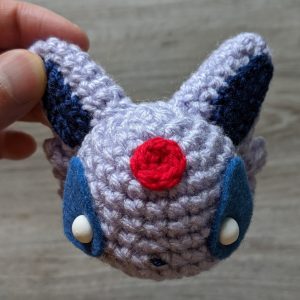
Cut two eye shapes out of blue felt in the shape pictured below.
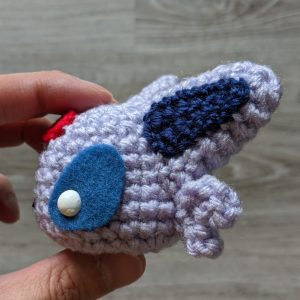
Insert the safety eyes through the felt where the “X” is and then below R8 and 6 stitches apart on the head.
Cut a small strand of dark blue yarn and embroider a nose in between the eyes.
Stuff and then sew the opening closed.
FOREHEAD GEM
R1 With R, sc 6 in magic ring (6)
Finish with a sl st. Cut a long tail for sewing.
Sew to the forehead.
EAR (Make 2)
R1 With P, sc 6 in magic ring (6)
R2 (sc 1, inc) three times (9)
R3 sc in each st around (9)
R4 (sc 2, inc) three times (12)
R5 sc in each st around (12)
R6 (sc 2, inc) four times (16)
R7 sc in each st around (16)
R14 (sc 6, dec) two times (14)
Finish with a sl st. Cut a long tail for sewing.
Stuff lightly and sew to the head.
INNER EAR (Make 2)
With B, chain 7.
Skip two ch, hdc 2, sc 3, turn to work the other side of the chain, sc 3, hdc 2.
Fasten off. Cut a long tail for sewing.
Sew to the ears.
WHISKER (Make 2)
With P, chain 4.
R1 Skip first ch, sc 3, ch 3 and turn
R2 Skip first ch, sc 2
Fasten off. Cut a long tail for sewing.
Sew below the ears.
BODY
R1 With P, sc 6 in magic ring (6)
R2 inc in each st around (12)
R3 (sc 2, inc) four times (16)
Finish with a sl st. Cut a short tail and weave in.
With F, chain 16.
In the following row (R4), you will crochet into the stitches in the fuchsia piece and the purple piece at the same time. This creates the “overhang” of the shirt.
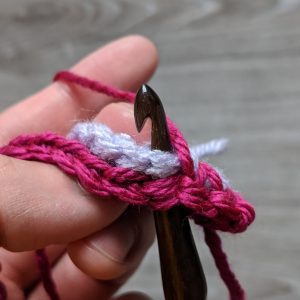
R4 Going through both stitches of the purple and fuchsia pieces, sc in each st around (16)
R5 (sc 6, dec) two times (14)
R7 (sc 5, dec) two times (12)
R8 (sc 4, dec) two times (10)
Finish with a sl st. Cut a long tail for sewing.
Sew the body to the head.
ARM (Make 2)
R1 With P, sc 6 in magic ring (6)
R2-3 sc in each st around (6)
R4 sc 4, dec (5)
Finish with a sl st. Cut a long tail for sewing.
Sew arms to the body.
LEG (Make 2)
R1 With P, sc 6 in magic ring (6)
R2-4 sc in each st around (6)
Finish with a sl st. Cut a long tail for sewing.
Sew legs to the body.
TAIL
Main Prong
R1 With P, sc 5 in magic ring (5)
R2-8 sc in each st around (5)
Finish with a sl st. Cut a long tail for sewing.
Small Prong
R1 With P, sc 5 in magic ring (5)
R2-5 sc in each st around (5)
Finish with a sl st. Cut a long tail for sewing. Sew the base of the small prong to the main prong.
Sew the base of the tail to the body.
COLLAR
With W, chain 17.
Skip first st, hdc 3, sc 10, hdc 3.
Fasten off. Cut a long tail for sewing.
Sew the collar below the neck.

This is such an amazing pattern, well done!
I just found your site so I’m getting knee-deep in all the wonderful patterns you’ve shared. Thank you!
Hi! I love it, she looks so Cute You have the pattern of umbreon? I want to make it, can You shared please.