Sea turtles are so cool. I mean, who doesn’t love these armoured marine reptiles? Just like sharks, these guys were around longer than humans have walked the earth. Depending on the species, sea turtles spend their lives (50 years or more) happily munching away on sea grasses, and animals such as jellyfish, shrimp, and squid.
One of my favourite facts about sea turtles is that they migrate to the same beach that they were born on to lay their eggs. They do this using Earth’s magnetic fields to navigate and make their way to their home beach where they hatched DECADES earlier. Imagine being able to swim through the expanse which is our oceans and know exactly where you want to go. Now that’s impressive!
Whenever I read about animals to learn more about them, I always get so sad when I come upon the conservation status sections. Almost all sea turtles are endangered due to a combination of habitat loss, climate change, and illegal poaching. What makes me the most upset is the callous treatment of these animals by humans. Harvesting their shells and skins to make jewellery and leather goods is still a practice that exists. One thing that we can do is not purchase goods that are produced from the suffering of animals.
I based this amigurumi pattern on the green sea turtle, a large herbivore that can grow up to 700 pounds. There are a few nuances to the shaping that I wanted to include in the pattern like the curve of the flippers and the teardrop shape of the carapace shell. These are done through simply placing increases or decreases right next to each other.
I hope you enjoy crocheting your very own sea turtle and learned something new about these fascinating animals.
MATERIALS
Yarns – green (G), white (W), black (B)
polyester fibrefill
two 8.0 mm safety eyes
size 8 (5.0 mm) crochet hook [I use hooks from Laurel Hill]
yarn needle [I use the bent tip needles from Clover]
ABBREVIATIONS
ch = chain
st = stitch
sc = single crochet
sl st = slip stitch
inc = single crochet 2 into the same stitch
dec = decrease over next two stitches (single crochet 2 stitches together or use invisible decrease)
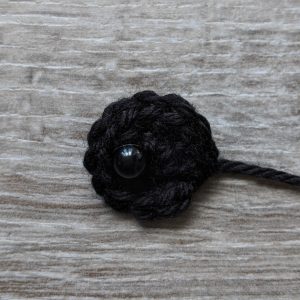
EYESPOT (Make 2)
R1 With B, sc 6 into magic ring (6)
R2 inc in each st around (12)
Finish with a sl st. Cut a long tail for sewing. Insert the safety eye below R1.
EYELID (Make 2)
R1 With B, sc 3 into magic ring, ch 1 and turn
R2 Skip first ch, inc, inc, inc
Fasten off. Cut a long tail for sewing.
HEAD
R1 With G, sc 6 into magic ring (6)
R2 inc in each st around (12)
R3 (sc 1, inc) six times (18)
R4 (sc 2, inc) six times (24)
R5 (sc 3, inc) six times (30)
R6-7 sc in each st around (30)
R8 sc 13, inc, sc 2, inc, sc 13 (32)
R9 sc 14, inc, sc 2, inc, sc 14 (34)
R10 sc 13, dec, dec, dec, dec, sc 13 (30)
R11 (sc 3, dec) six times (24)
R12 (sc 2, dec) six times (18)
R13 (sc 1, dec) six times (12)
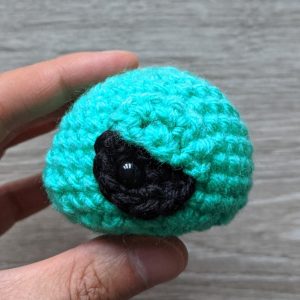
Insert the safety eyes 8 rows from the top and 10 stitches apart.
Sew the eyelids over the eye at a slant.
Stuff firmly with polyfill before closing up the head in the next row.
R14 dec six times (6)
Finish with a sl st. Cut a short tail and sew the opening closed.
ARM (Make 2)
R1 With G, sc 6 into magic ring (6)
R2 sc 2, inc, inc, sc 2 (8)
R3 sc 3, inc, inc, sc 3 (10)
R4 sc 4, inc, inc, sc 4 (12)
R5 sc in each st around (12)
R6-7 inc, sc 3, dec, dec, sc 3, inc (12)
R8 sc 4, dec, dec, sc 4 (10)
R9 sc 3, dec, dec, sc 3 (8)
R10 sc 2, dec, dec, sc 2 (6)
Finish with a sl st. Cut a long tail for sewing.
BACK LEG (Make 2)
R1 With G, sc 6 into magic ring (6)
R2 sc 5, inc (7)
R3 sc 6, inc (8)
R4-5 sc in each st around (8)
Finish with a sl st. Cut a long tail for sewing.
BODY
R1 With G, sc 6 into magic ring (6)
R2 (sc 2, inc) two times (8)
R3 sc in each st around (8)
R4 (sc 3, inc) two times (10)
R5 sc in each st around (10)
R6 (sc 4, inc) two times (12)
R7 (sc 1, inc) six times (18)
R8-10 sc in each st around (18)
R11 (sc 7, dec) two times (16)
R12 (sc 2, dec) four times (12)
R13 (sc 1, dec) four times (8)
R14 sc in each st around (8)
R15 (sc 3, inc) two times (10)
Finish with a sl st. Cut a long tail for sewing.
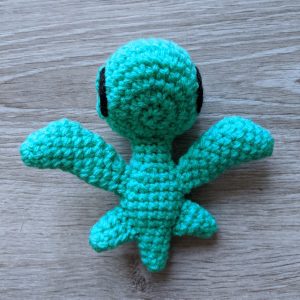
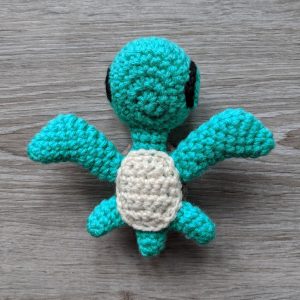
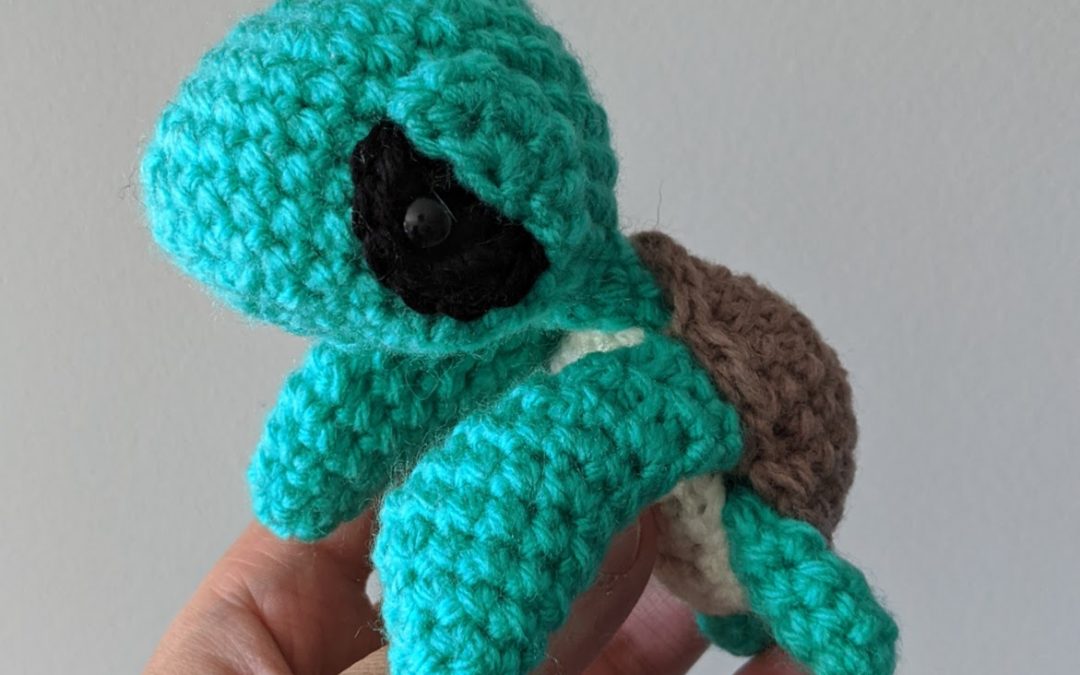
Sew the head to the body. Sew the arms and legs to the body as shown.
BACK SHELL
R1 With B, sc 6 into magic ring (6)
R2 inc in each st around (12)
R3 (sc 1, inc) six times (18)
R4 (sc 2, inc) six times (24)
R5 sc in each st around (24)
R6 sc 11, inc, inc, sc 11 (26)
Finish with a sl st. Cut a long tail for sewing.
Sew to the top of the body.
BOTTOM SHELL
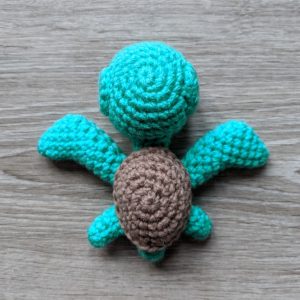
This piece is worked in rows.
With C, chain 5.
R1 Skip first ch from hook, sc 4, ch 1 and turn
R2 Skip first ch from hook, sc 2, inc, sc 1, ch 1 and turn
R3 Skip first ch from hook, sc 2, inc, sc 2, ch 1 and turn
R4-5 Skip first ch from hook, sc 6, ch 1 and turn
R6 Skip first ch from hook, sc 2, dec, sc 2, ch 1 and turn
R7 Skip first ch from hook, sc 1, dec, sc 2, ch 1 and turn
R8 Skip first ch from hook, sc 1, dec, sc 1
Next you will be crocheting around the edge of the piece. This will give a clean edging around the perimeter of the piece.
From A to B, sc 8.
From B to C, sc 4.
From C to D, sc 8.
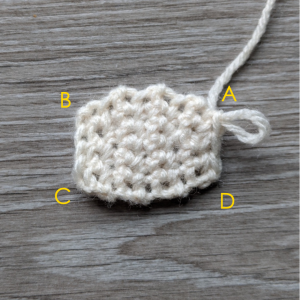
Fasten off. Cut a long tail for sewing.
Sew to the bottom of the body.

They are so cute. My Grandchildren will love them.