Happy New Year, friends! If you follow the lunar calendar, on February 1, 2022, we celebrate the Year of the Tiger. For those born under the year of the tiger (1926, 1938, 1950, 1962, 1974, 1986, 1998 or 2010), tigers are known for their courage and ambition.
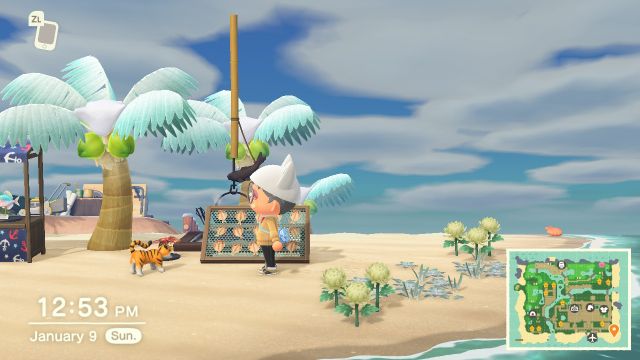
The paper tiger item from Animal Crossing New Horizons is one of my favourite furniture pieces in the game. I’ve placed them all over my island and pretend that they are stray cats hanging around my storefronts and food stands catching scraps.

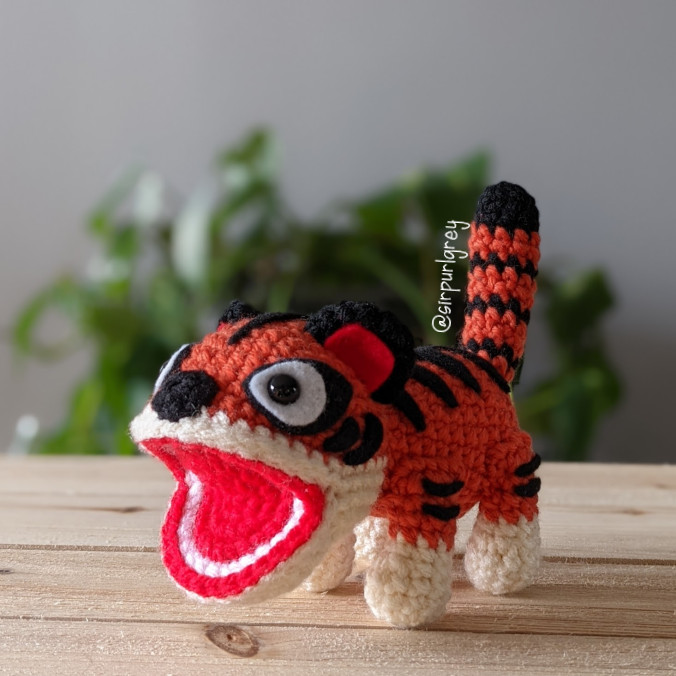
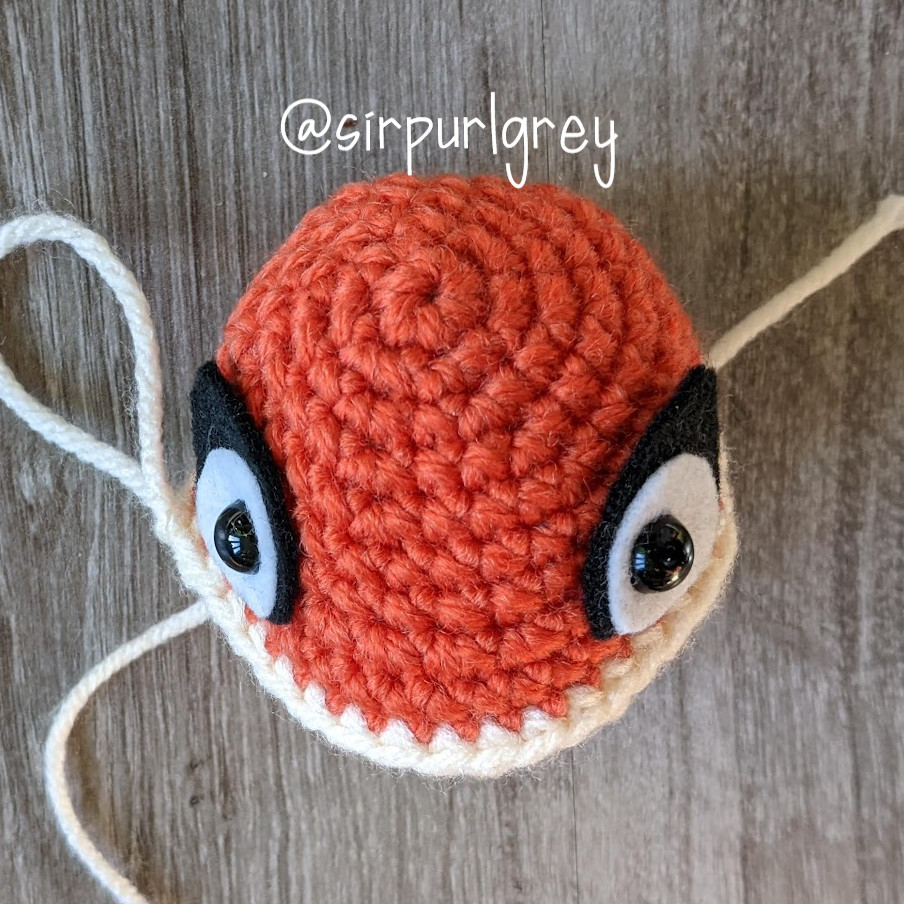
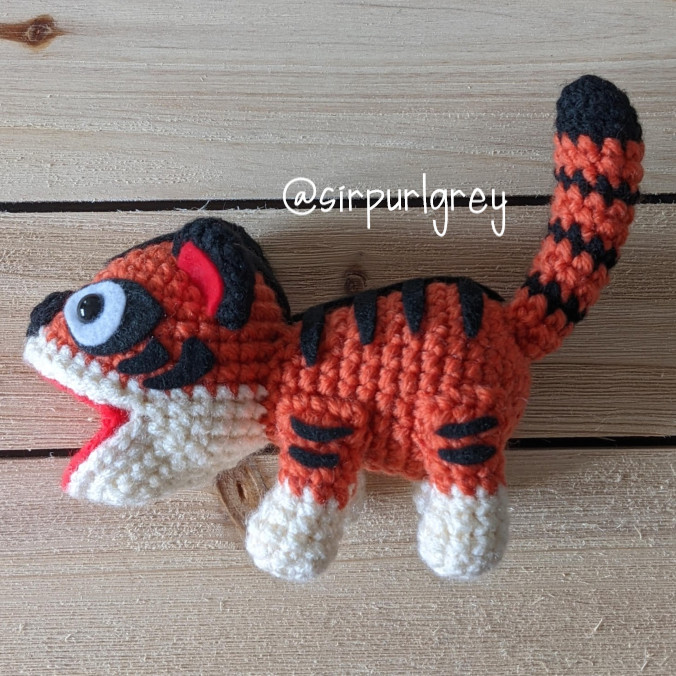
When I thought about what I wanted to crochet for the Year of the Tiger, my mind immediately went to wanting create an amigurumi version of the paper tiger item. It’s got this goofy, large mouth that is wide open in a perpetual roar. I designed the mouth similarly to how I made my piranha plant from Super Mario. The open mouth is created by leaving a large gap in the head with a row of skipped stitches. The inside of the mouth is separate piece that is crocheted together with the head.
I want to wish you all a flourishing Year of the Tiger and hope that you enjoy crocheting your very own paper tiger!
MATERIALS/TOOLS
Yarns – orange (O), cream (C), red (R), white (W), black (B) [I use Bernat Premium]
Hook – size 6 (4.0 mm)
Notions – two 10.0 mm safety eyes, black felt, white felt, white glue
Tools – scissors, polyester fibrefill, yarn needle [I use the bent tip needles from Clover]
ABBREVIATIONS
ch = chain
st = stitch
sc = single crochet
sl st = slip stitch
inc = single crochet 2 into the same stitch
dec = decrease over next two stitches (single crochet 2 stitches together or use invisible decrease)
HEAD
R1 With O, sc 6 in magic ring (6)
R2 inc in each st around (12)
R3 (sc 1, inc) six times (18)
R4 (sc 2, inc) six times (24)
R5 (sc 3, inc) six times (30)
R6-7 sc in each st around (30)
R8 sc 8, inc, sc 4, inc, inc, inc, inc, sc 4, inc, sc 8 (36)
R9 sc in each st around (36)
R11 With C, sc in each st around (36)
R12 sc 9, ch 18, skip 18 st, sc 9 (36)
R13 sc 9, sc 18 into ch, sc 9 (36)
R14 (sc 4, dec) six times (30)
R15 (sc 3, dec) six times (24)
R16 dec twelve times (12)
R17 dec six times (6)
Finish with a sl st into the next st. Cut a short yarn tail for sewing.
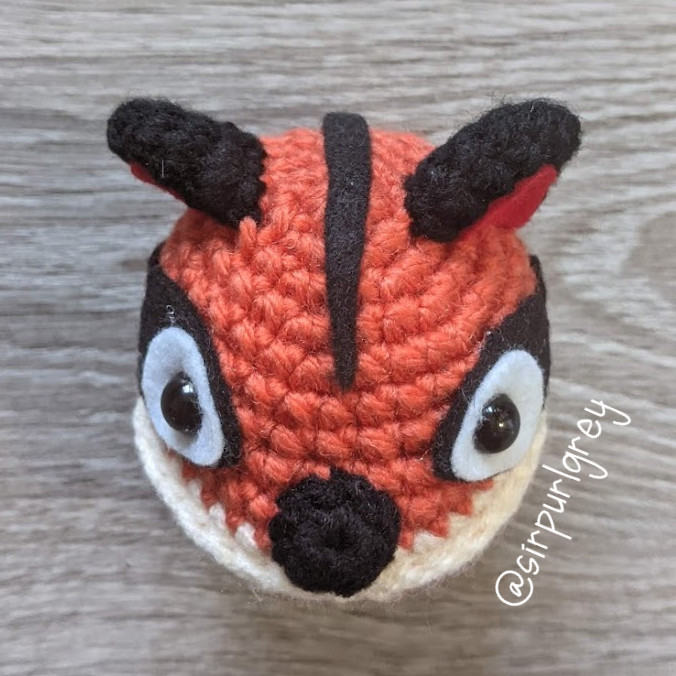
Cut out the eye shapes out of black and white felt using the templates below. Pierce a hole in the spots marked with an “×” and insert the safety eyes through the two pieces of felt with the white on top of the black. Then insert the safety eyes below R7 and eight stitches apart. Glue the felt to the head.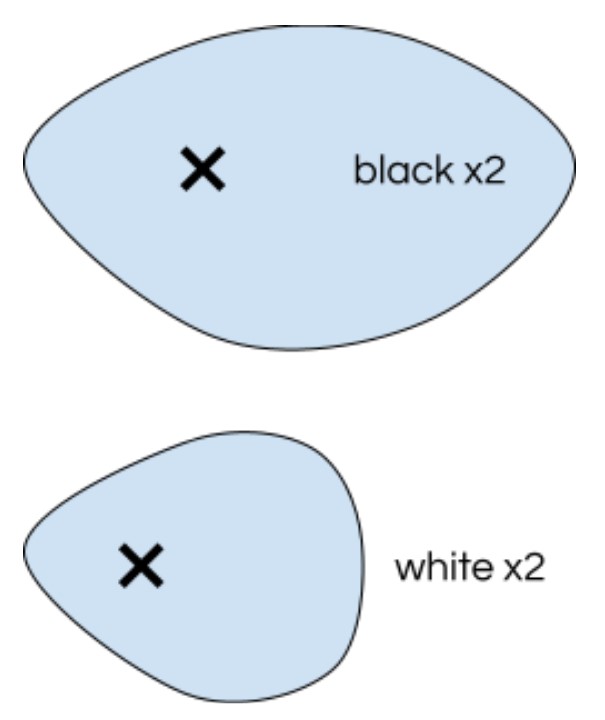
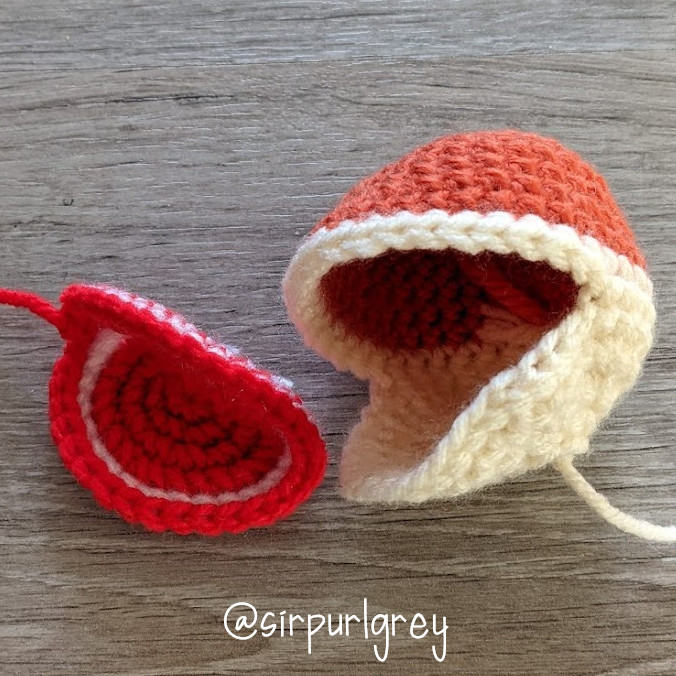
INSIDE MOUTH PIECE
R1 With R, sc 6 in magic ring (6)
R2 inc in each st around (12)
R3 inc in each st around (24)
R4 With W, (sc 3, inc) six times (30)
R5 With R, (sc 4, inc) six times (36)
Finish with a sl st into the next st. Cut a short yarn tail and weave in.
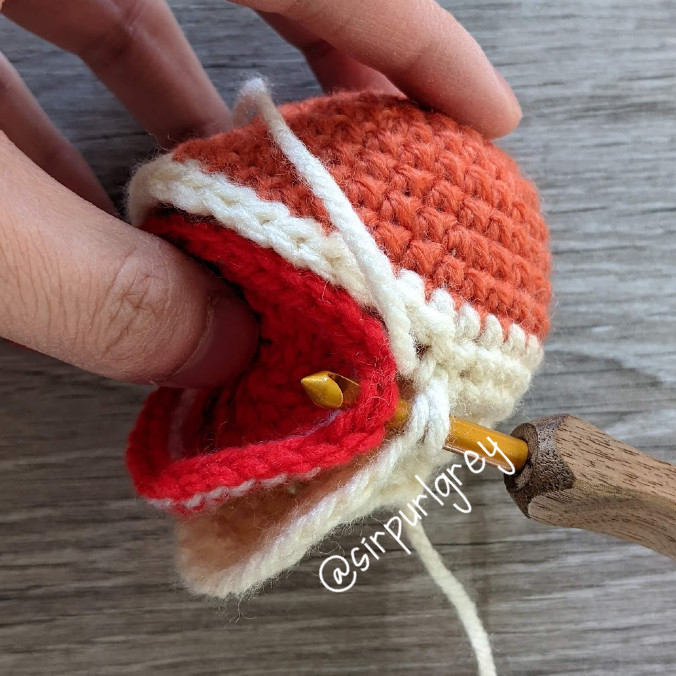
ATTACHING HEAD AND INNER MOUTH PIECE
Fold the inside mouth piece in half. Place the piece inside the mouth.
In the next step, you will be crocheting into the edge of the mouth and the mouth piece at the same time. Starting from the left edge of the mouth, inserting the hook both stitches on the cream and red pieces, sl st 36 around the mouth. Then sl st into the next st. Cut a short yarn tail and weave in. Add polyfill stuffing into the head as you go.
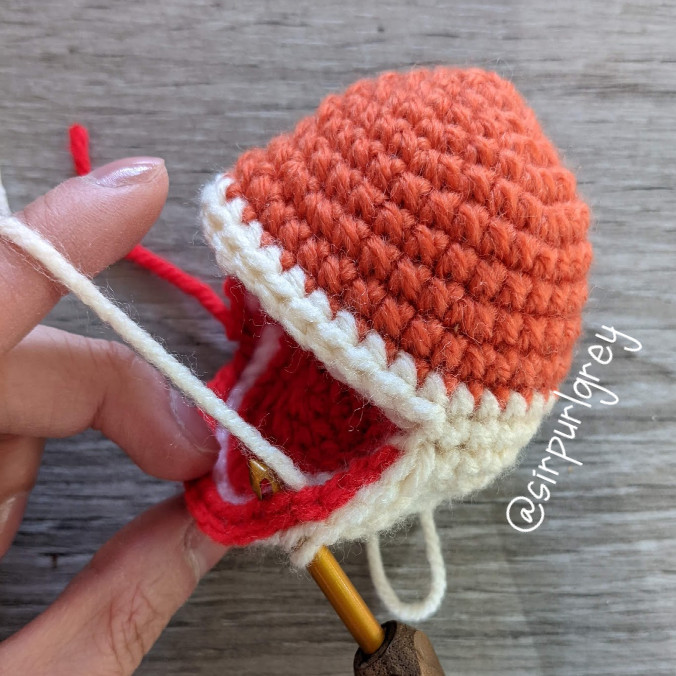
Once the head is sufficiently stuffed, sew the bottom opening of the head closed.
NOSE
R1 With B, sc 6 in magic ring (6)
Finish with a sl st into the next st. Cut a long yarn tail for sewing.
EAR (Make 2)
R1 With B, sc 6 in magic ring (6)
R2 inc in each st around (12)
R3 (sc 5, inc) two times (14)
R4 sc in each st around (14)
Finish with a sl st into the next st. Cut a long yarn tail for sewing.
HEAD ASSEMBLY
Sew the ears to the head.
Sew the nose to the head.
Cut out the cheek stripes out of black felt using the templates below. Glue the felt to the cheeks.
Cut out the head stripe out of black felt using the template below. Glue the felt to the center of the head.

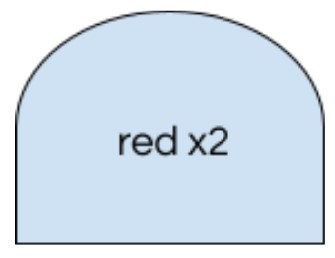
Cut out the inner ear shapes out of red felt using the template below. Glue the felt to the ears.

BODY
R1 With O, sc 6 in magic ring (6)
R2 inc in each st around (12)
R3 (sc 1, inc) six times (18)
R4 (sc 2, inc) six times (24)
R5 (sc 3, inc) six times (30)
R6-8 sc in each st around (30)
R9 (sc 3, dec) six times (24)
R10-12 sc in each st around (24)
R13 (sc 3, dec) two times (dec, sc 4) two times (20)
R14 sc in each st around (20)
R15 sc 8, dec, dec, sc 8 (18)
Finish with a sl st into the next st. Cut a long yarn tail for sewing.
RIGHT LEG (Make 2)
R1 With C, sc 6 in magic ring (6)
R2 (inc, inc, sc 1) two times (10)
R3-4 sc in each st around (10)
R5 (sc 3, dec) two times (8)
R6 sc in each st around (8)
R7 With O, sc in each st around (8)
R8 sc in each st around (8)
R9 sc 5, ch 1 and turn
R10 Skip first ch, sc 4
Yarn over and draw yarn through loop on hook to fasten off. Cut a long yarn tail for sewing.
R10 creates a little nook for the body to sit into.
LEFT LEG (Make 2)
R1 With C, sc 6 in magic ring (6)
R2 (inc, inc, sc 1) two times (10)
R3-4 sc in each st around (10)
R5 (sc 3, dec) two times (8)
R6 sc in each st around (8)
R7 With O, sc in each st around (8)
R8 sc in each st around (8)
R9 sc 7, ch 1 and turn
R10 Skip first ch, sc 4
Yarn over and draw yarn through loop on hook to fasten off. Cut a long yarn tail for sewing.
R10 creates a little nook for the body to sit into.
TAIL
R1 With B, sc 6 in magic ring (6)
R2 (inc, inc, sc 1) two times (10)
R3-4 sc in each st around (10)
R5 With O, sc in each st around (10)
R6 sc in each st around (10)
R7 With B, sc in each st around (10)
R8 With O, sc in each st around (10)
R9 sc 4, dec, sc 4 (9)
R10 With B, sc in each st around (9)
R11 With O, sc in each st around (9)
R12 sc 3, dec, sc 4 (8)
R13 With B, sc in each st around (8)
R14 With O, sc in each st around (8)
Finish with a sl st into the next st. Cut a long yarn tail for sewing.
BODY ASSEMBLY
Use the yarn tail from the body to sew the body to the head.
Sew the legs to the body as shown. The curve of the body should sit into the nook created by R10 of the legs.
Sew the tail to the body.
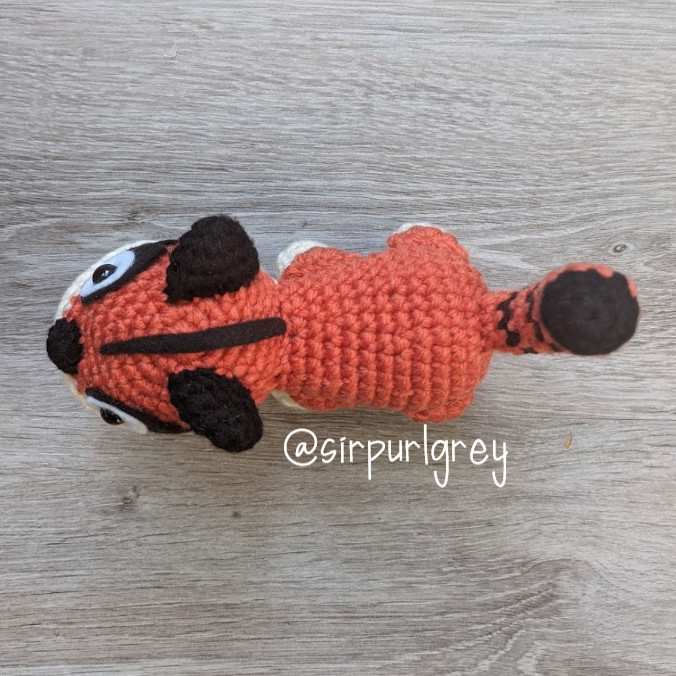

Cut out the back stripe pieces out of black felt using the templates below and glue them to the back of the body.
Cut out the leg stripe pieces out of black felt using the templates below and glue them to the top of the legs.

![]() (leg stripes)
(leg stripes)


OMGS I love him so much and I cannot wait to make one! I have one in game and now I get to have one in RL! Thank you for this pattern!
I’m so excited to make this. I make everyone pet mine when they come in my house and it annoys the crap out of them. I can’t wait to bring Barry to life.