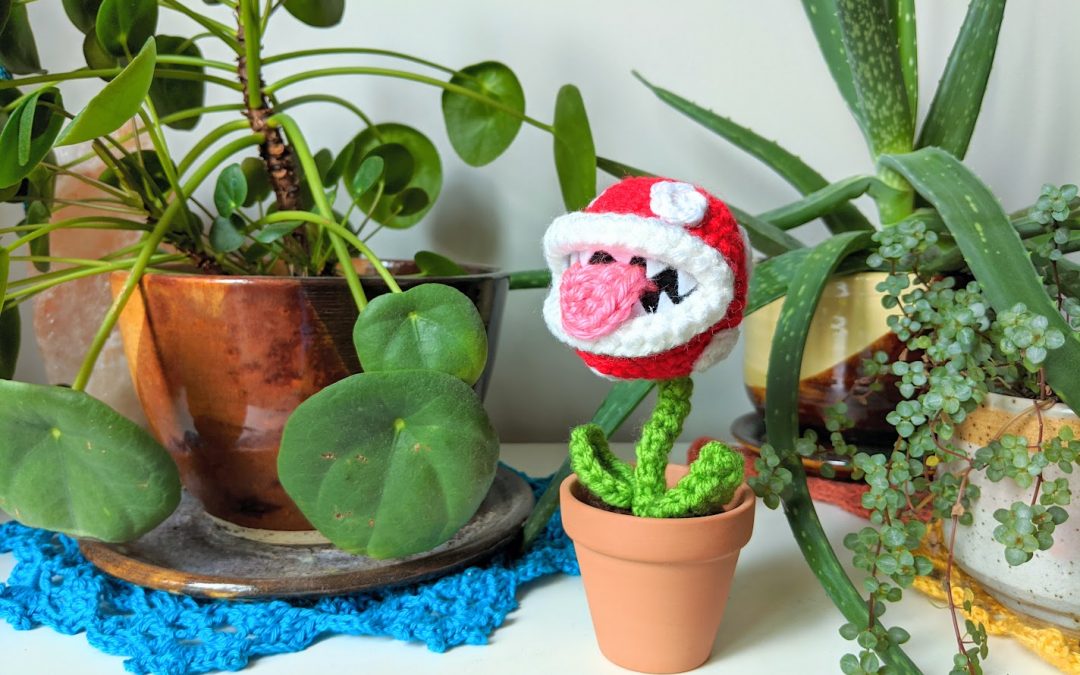
Anyone that knows me well knows that I LOVE Nintendo and that the fondest memories of my childhood are of playing Super Mario World for the SNES. Even now as an adult, the characters and creatures from that Mario universe continue to resonate with me and inspire my work.
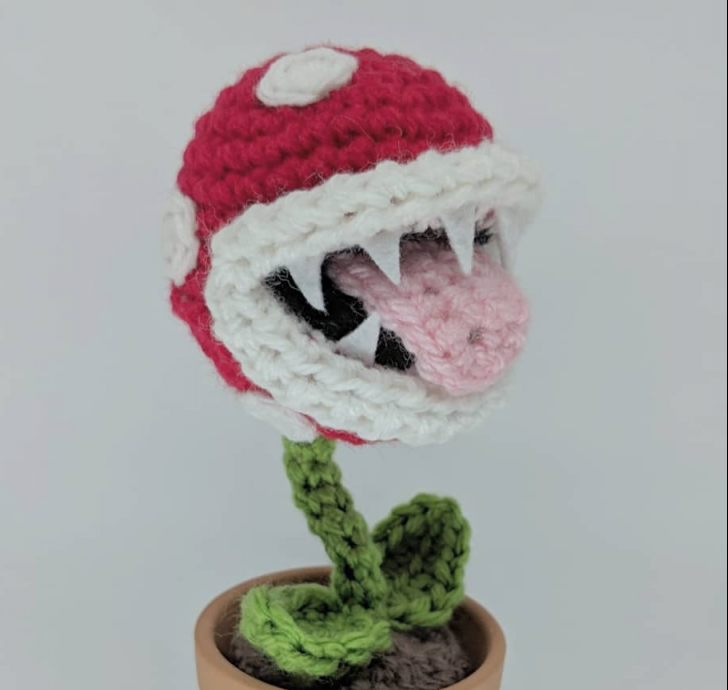
Though this piranha plant pattern has less pieces to crochet than my usual amigurumi, creating the open mouth and lips was a huge challenge. At first I crocheted a long tube and sewed it around the mouth but I didn’t like seeing the seam where I joined the two ends of the tube and it was a pain so position for sewing. I’m always down for some problem-solving and tried out a few other ideas for the lips before settling on the one used in this pattern. It’s not a technique that I’ve ever had to use but it’s now in my wheelhouse if a similar problem were to ever arise.
I’ve made a tutorial video to help with the trickier parts of the pattern. Now you can crochet your own Piranha plant that you can use to spice up your decor and you don’t even need to water it!
Remember to tag @sirpurlgrey on Instagram to share your work with me!
MATERIALS
Medium/worsted weight yarns:
red (R), black (B), pink (P), white (W), green (G), dark Brown (D)
size 8 (5.0 mm) crochet hook [I use hooks from Laurel Hill]
yarn needle [I use the bent tip needles from Clover]
plant wire
white felt
glue
small terra cotta pot (The pot that I used is 6 cm wide at the bottom and 8.5 cm wide on top)
polyester fibrefill
ABBREVIATIONS
ch – chain
st – stitch
sc – single crochet
hdc – half double crochet
sl st – slip stitch
inc – single crochet 2 into the same stitch
dec – decrease over next two stitches (single crochet 2 stitches together or use invisible decrease)
HEAD
R1 With R, sc 6 in magic ring (6)
R2 inc in each st around (12)
R3 (sc 1 , inc) six times (18)
R4 (sc 2, inc) six times (24)
R5 (sc 3, inc) six times (30)
R6-8 sc in each st around (30)
R9 sc 8, chain 14, skip 14 st, sc 8 (30)
R10-11 sc in each st around (30)
R12 (sc 3, dec) six times (24)
R13 (sc 2, dec) six times (18)
R14 (sc 1, dec) six times (12)
R15 dec six times (6)
Finish with a sl st. Cut a short tail and sew the opening closed.
INSIDE OF MOUTH (Make 2)
R1 With B, sc 4 in a magic ring, ch 1 and turn
R2 Skip first ch, inc, inc, inc, inc, ch 1 and turn
R3 Skip first ch, (sc 1, inc) four times, ch 1 and turn
R4 Skip first ch, (sc 5, inc) two times
Finish with a sl st. For one of the pieces, cut a short tail and weave in. For the other piece, cut a long tail for sewing.
TONGUE
With P, chain 8.
Skip two ch from hook, hdc 5, inc.
Turn to work other side of ch, inc, hdc 5.
Fasten off. Leave long tail for sewing.
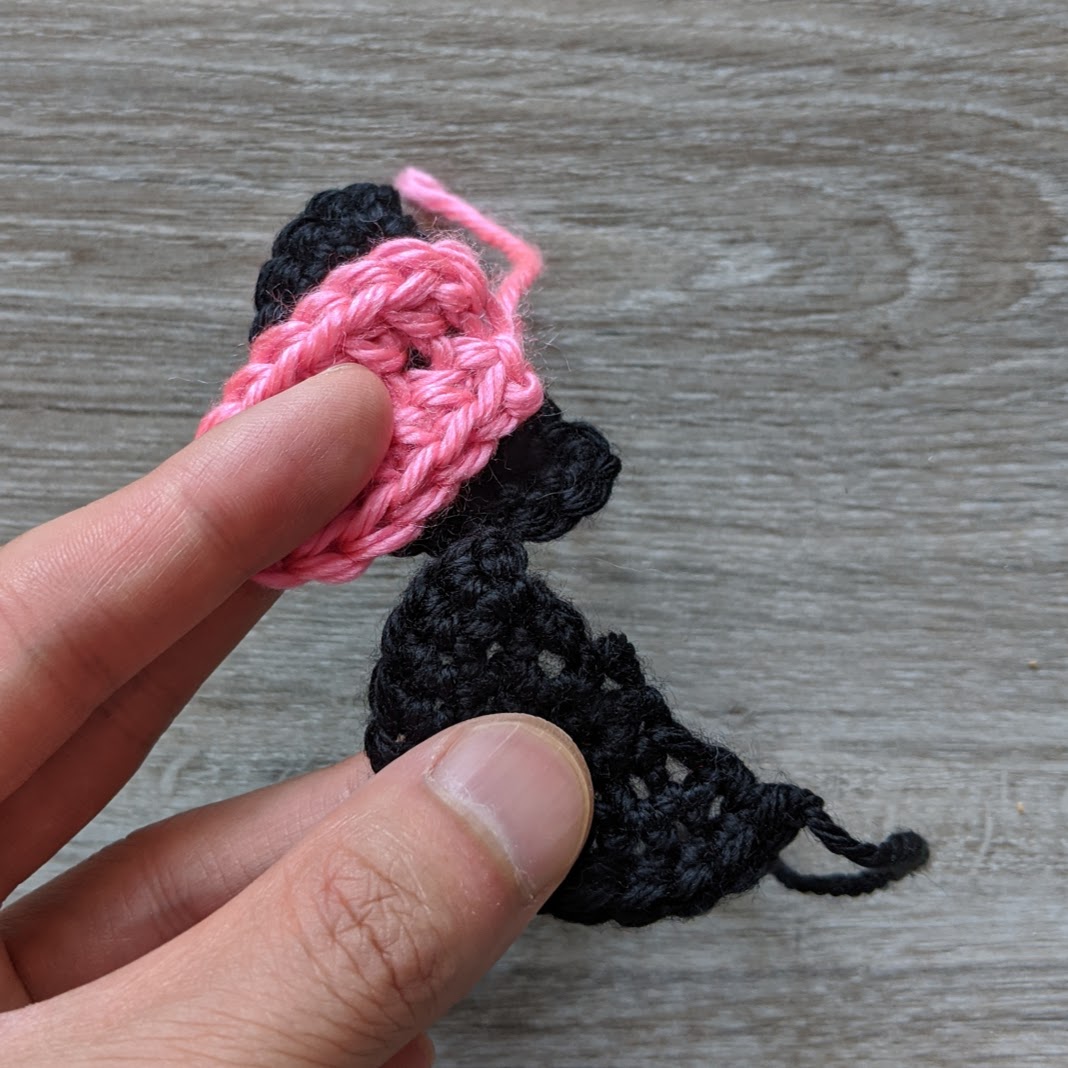
Place the tongue between the black pieces and sew the flat edges together.
LIPS
Place the INSIDE OF MOUTH piece in the HEAD opening. You will be crocheting into the stitches of the HEAD and INSIDE OF MOUTH at the same time.
R1 With W, sc 28 around the edge of the mouth (28)
R2-3 hdc in each st around (28)
Finish with a sl st. Leave long tail for sewing.
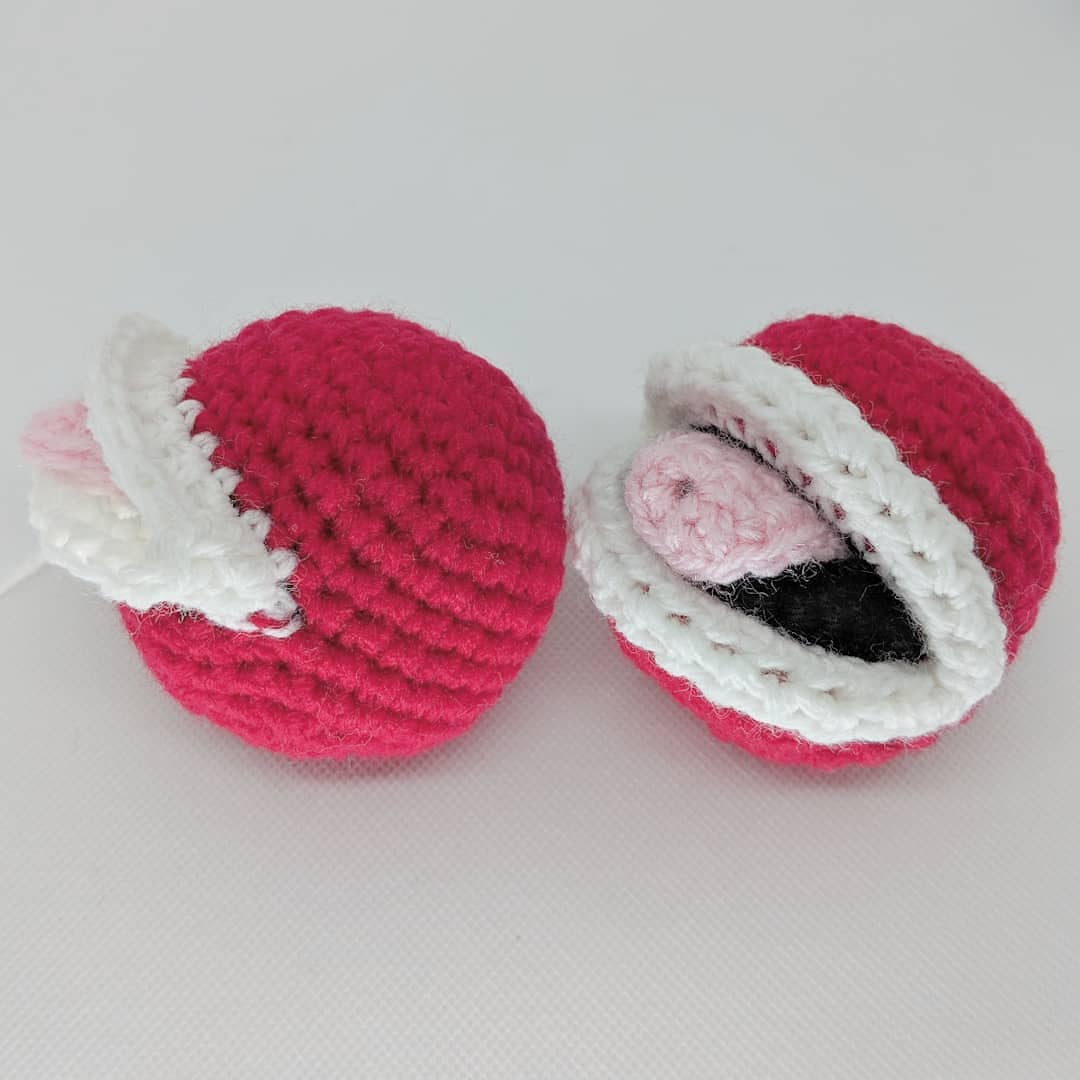
Curl the edge of the lips and sew the edge to the head.
SPOTS (Make 6)
R1: With W, sc 6 in magic ring (6)
Finish with a sl st. Leave long tail for sewing.
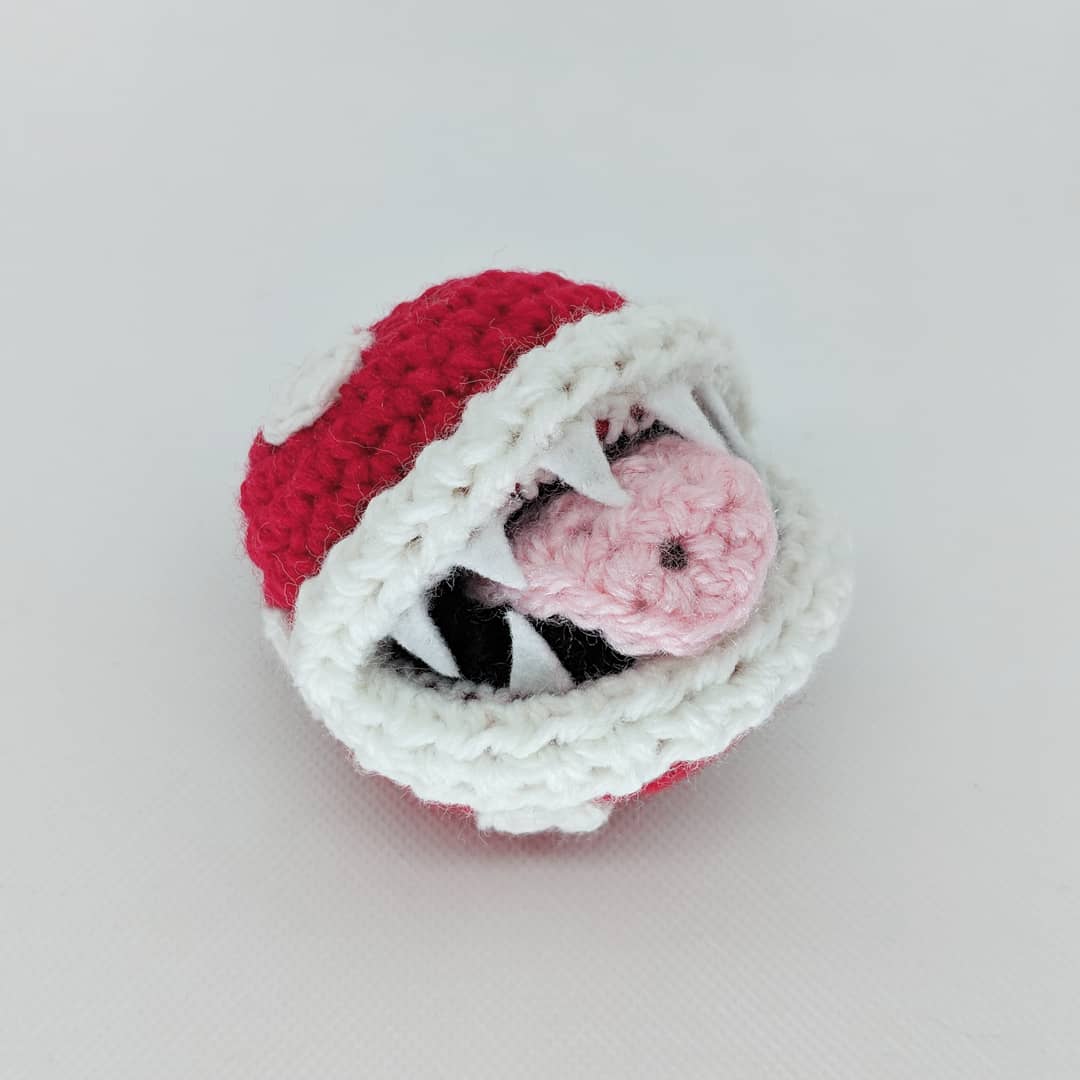
Sew the spots so that they are spaced out randomly on the head. Cut small triangles out of white felt and glue to the head for the teeth.
LEAF (Make 2)
With G, chain 7.
Skip first ch from hook, hdc 4, sc 2.
Turn to work other side of chain, sc 2, hdc 4.
Fasten off. Leave long tail for sewing.
STEM
With G, chain 5. Join into a ring with a sl st.
R1-8: sc in each st around (5)
Finish with a sl st. Leave a long tail for sewing.
Cut a length of thin plant wire and fold it into a ~12 cm bundle. Insert it through the STEM.
Sew one edge of the STEM to the bottom of the HEAD.
DIRT
The pot that I used is 6 cm wide at the bottom and 8.5 cm wide on top.
Depending on how tall your pot is, you may have to add or subtract rows (between rows 8 to 10) from the pattern.
R1 With D, sc 6 in magic ring (6)
R2 inc in each st around (12)
R3 (sc 1, inc) six times (18)
R4 In back loops only, sc in each st around (18)
R5-6 sc in each st around (18)
R7 (sc 2, inc) six times (24)
R8-10 sc in each st around (24)
R11 In back loop only, (sc 2, dec) six times (18)
R12 (sc 1, dec) six times (12)
R13 dec six times (6)
Finish with a sl st. Cut a short tail and sew the opening closed.
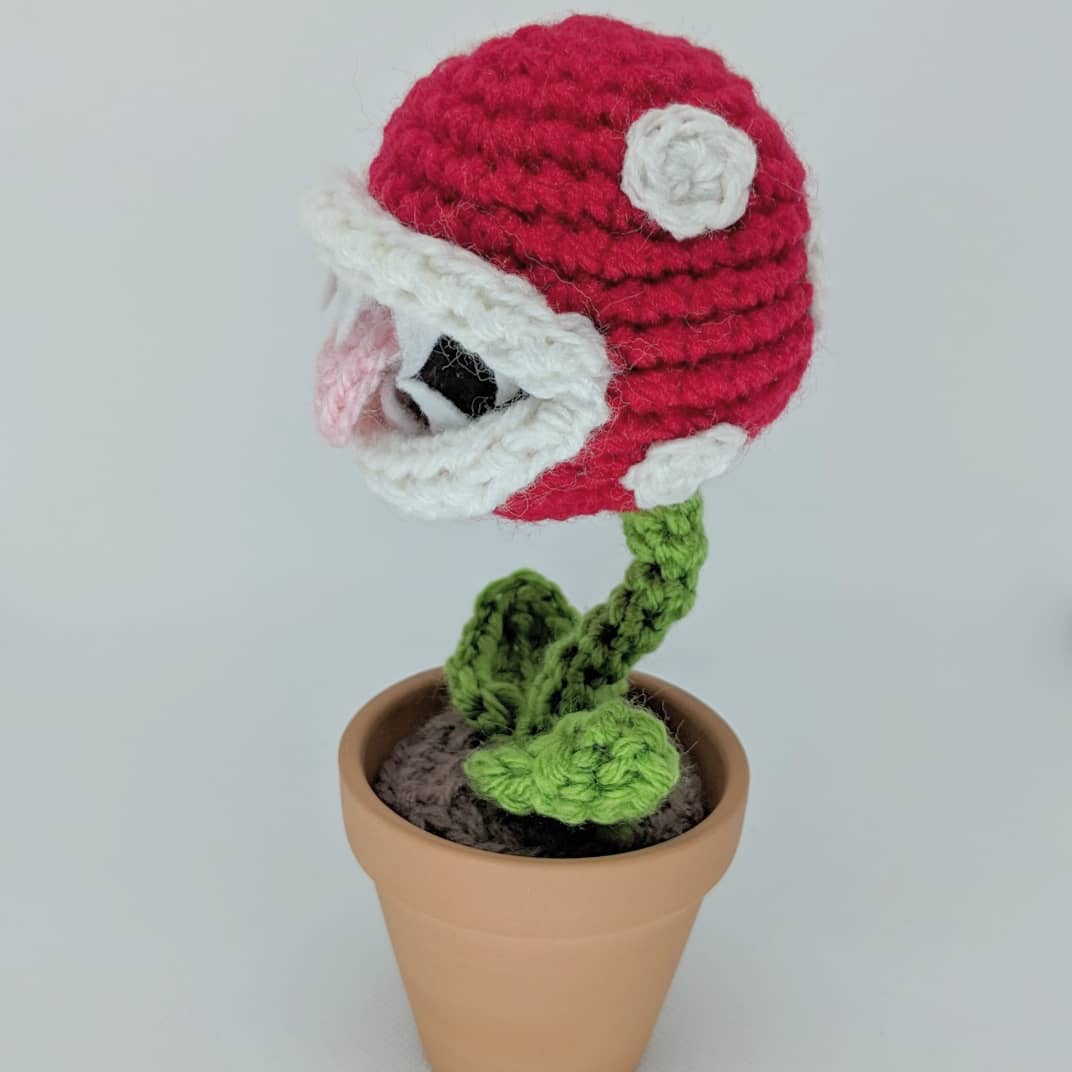
Sew the STEM to the DIRT and then the LEAVES to the DIRT. Place a bit of glue at the bottom of the pot to adhere the DIRT.


Could u help me understand round 9 sc8,chain14,sc8 thank u Love your work.
You will single crochet the first 8 stitches and then chain 14 stitches which will create the mouth opening. Skip 14 stitches from the last round, and single crochet 8 to the end of round.
thank you for the wonderful pattern <3
Loved To do this, the head was heavy so it was a challenge for the head to stay up. But overrall, was a lot of fun! Thanks for the pattern!
I’m so glad I watched the video. You are truly an artist! Watching you make the Piranha Plant not only clarified some questions I had about amigurumi in general but watching you work was a pleasure.
Have you seen the original movie with Jack Nicholson titled Little Shop of Horrors? It has a murderous man-eater plant of the same kind. You may enjoy it. Admittedly it is a tad hokey but tremendous fun
Wendy, thank you so much and I’m glad you enjoyed working through the pattern! I watched Little Shop of Horrors as a kid and loved it!
Love this type will be following you now I have found you
Thank you for such a wonderful pattern!
Great pattern, my first crochet project for 2022! I think I might make your Alpaca pattern next, so cute. Do you have patterns for any other Super Mario Bros. characters?
Great pattern. Easy to follow. Love my new piranha plant 💚
Thank you so much for this wonderful pattern. I didn’t watch the video because the written pattern was so easy to follow. I made this for my Granddaughter who will be graduating college on a few days and is going to decorate her classroom with video games. This adorable plant will be on her desk. I can’t wait to gift it to her.