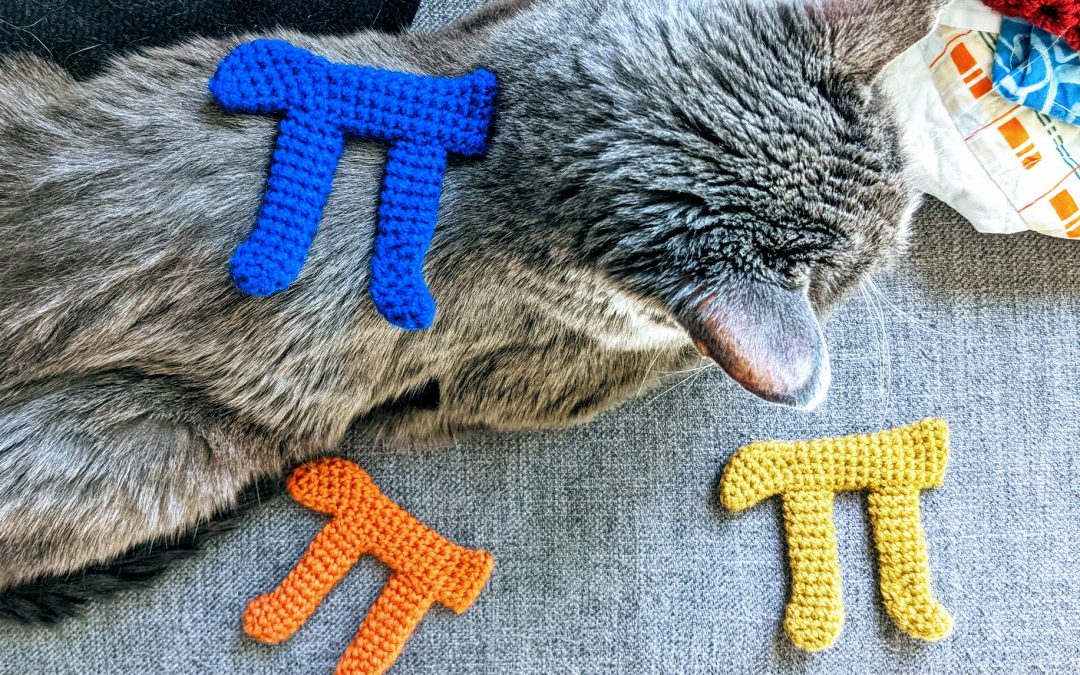
March 14 is a special day for math enthusiasts everywhere. The date 3/14 or written as 3.14 is an approximation of pi (π), which is a mathematical constant that represents the ratio of a circle’s circumference to its diameter. If you want to get even more specific, you can make sure to only begin your celebration of Pi Day at a time of 1:59 so that the approximation now becomes 3.14159.
As a high school math teacher, I am more excited to celebrate Pi Day than Christmas day. I’m not ashamed to say that the pi symbol, π, adorns several items of clothing that I own. This year I am combining my love of pi and crochet together to bring you this pattern.
I think I’ve always been drawn to crocheting and knitting because of the math that inherently exists in the patterns. When I’m designing shapes for my amigurumi, I love calculating numbers and thinking about how factors and multiples affect the curves and bends that I want to make.
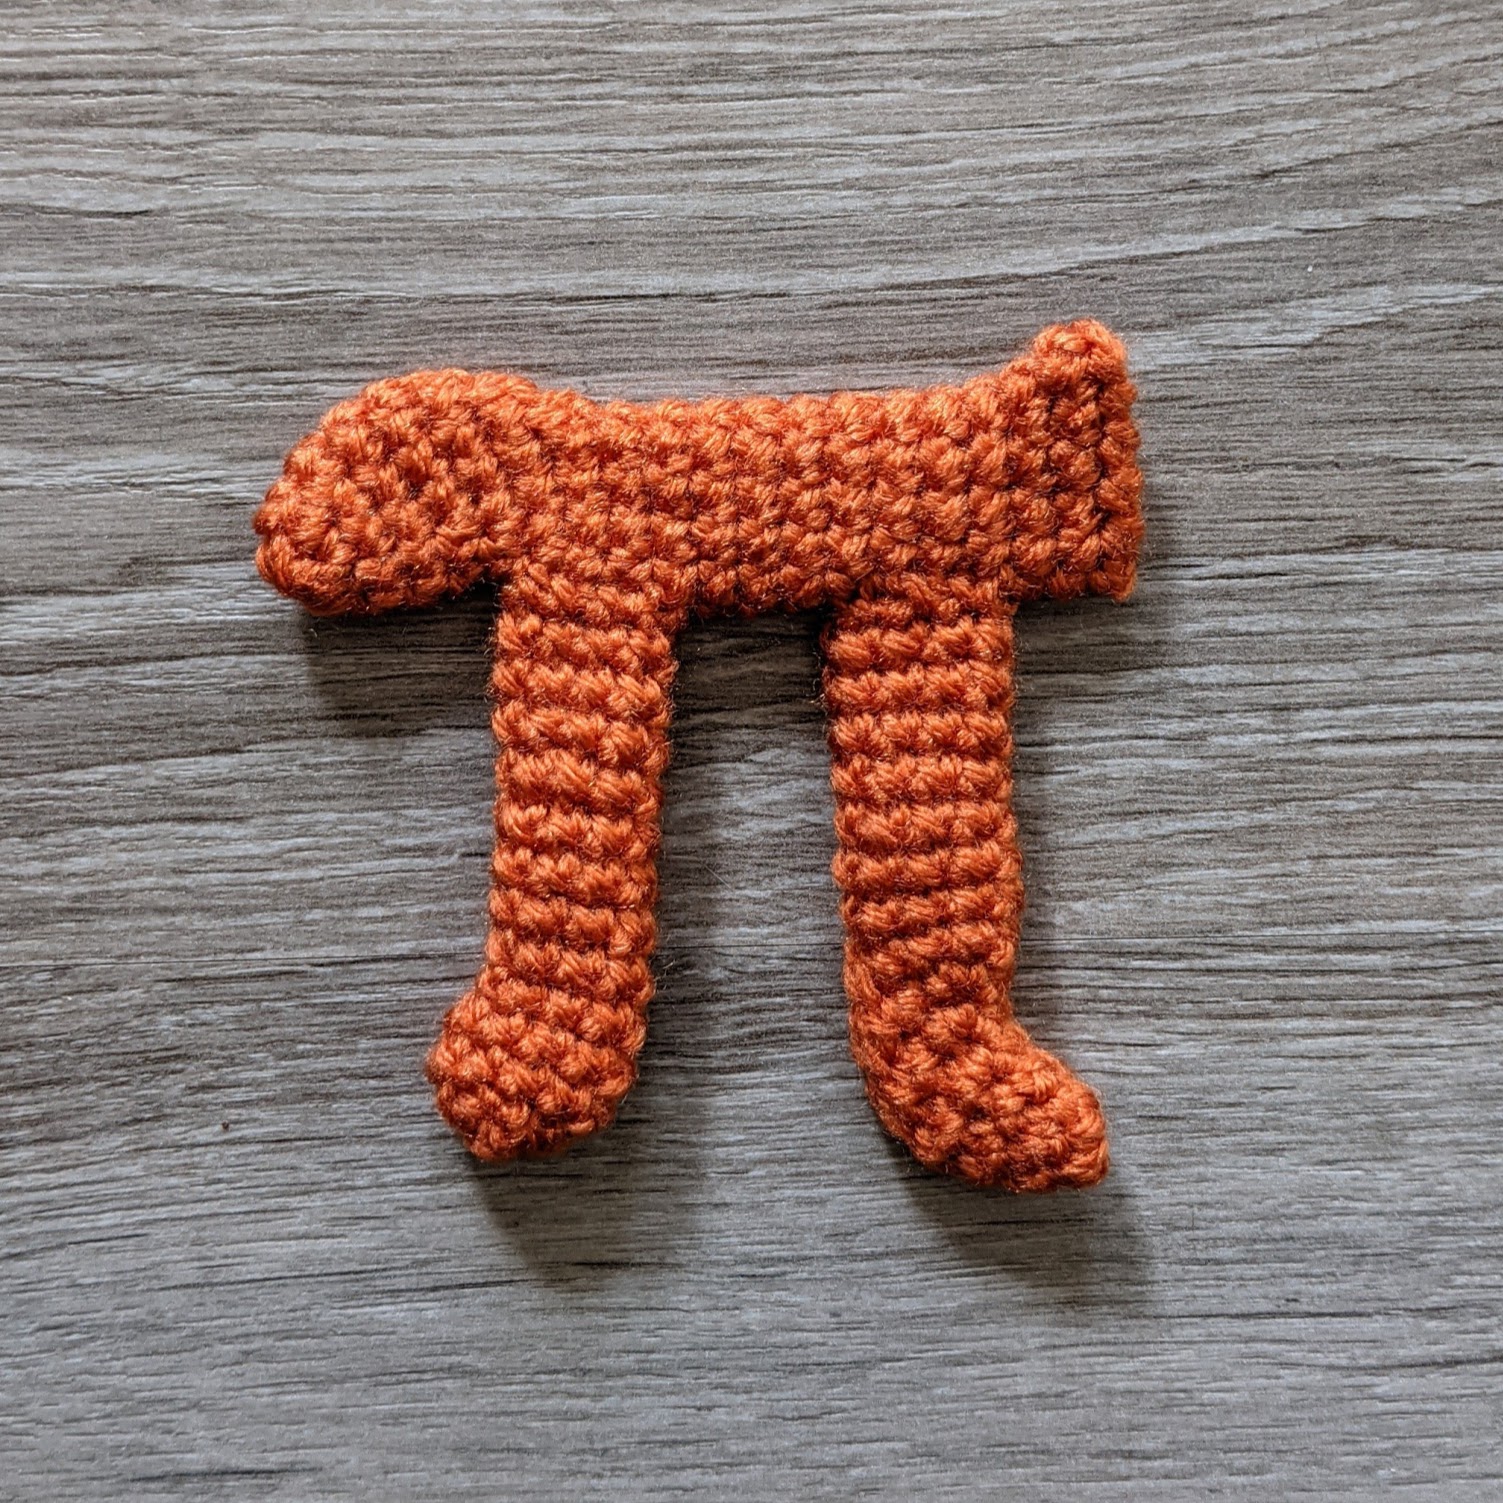
This pattern for the pi (π) symbol crochets up really quick and I hope that you or the math nerd in your life enjoys making it. Happy Pi Day!
MATERIALS
Medium/worsted weight (4) yarn in any colour
Size 8 (5.0 mm) crochet hook
Scissors
Yarn needle
ABBREVIATIONS
ch = chain
st = stitch
sc = single crochet
sl st = slip stitch
inc = single crochet 2 into the same stitch
dec = decrease over next two stitches (single crochet 2 stitches together or use invisible decrease)
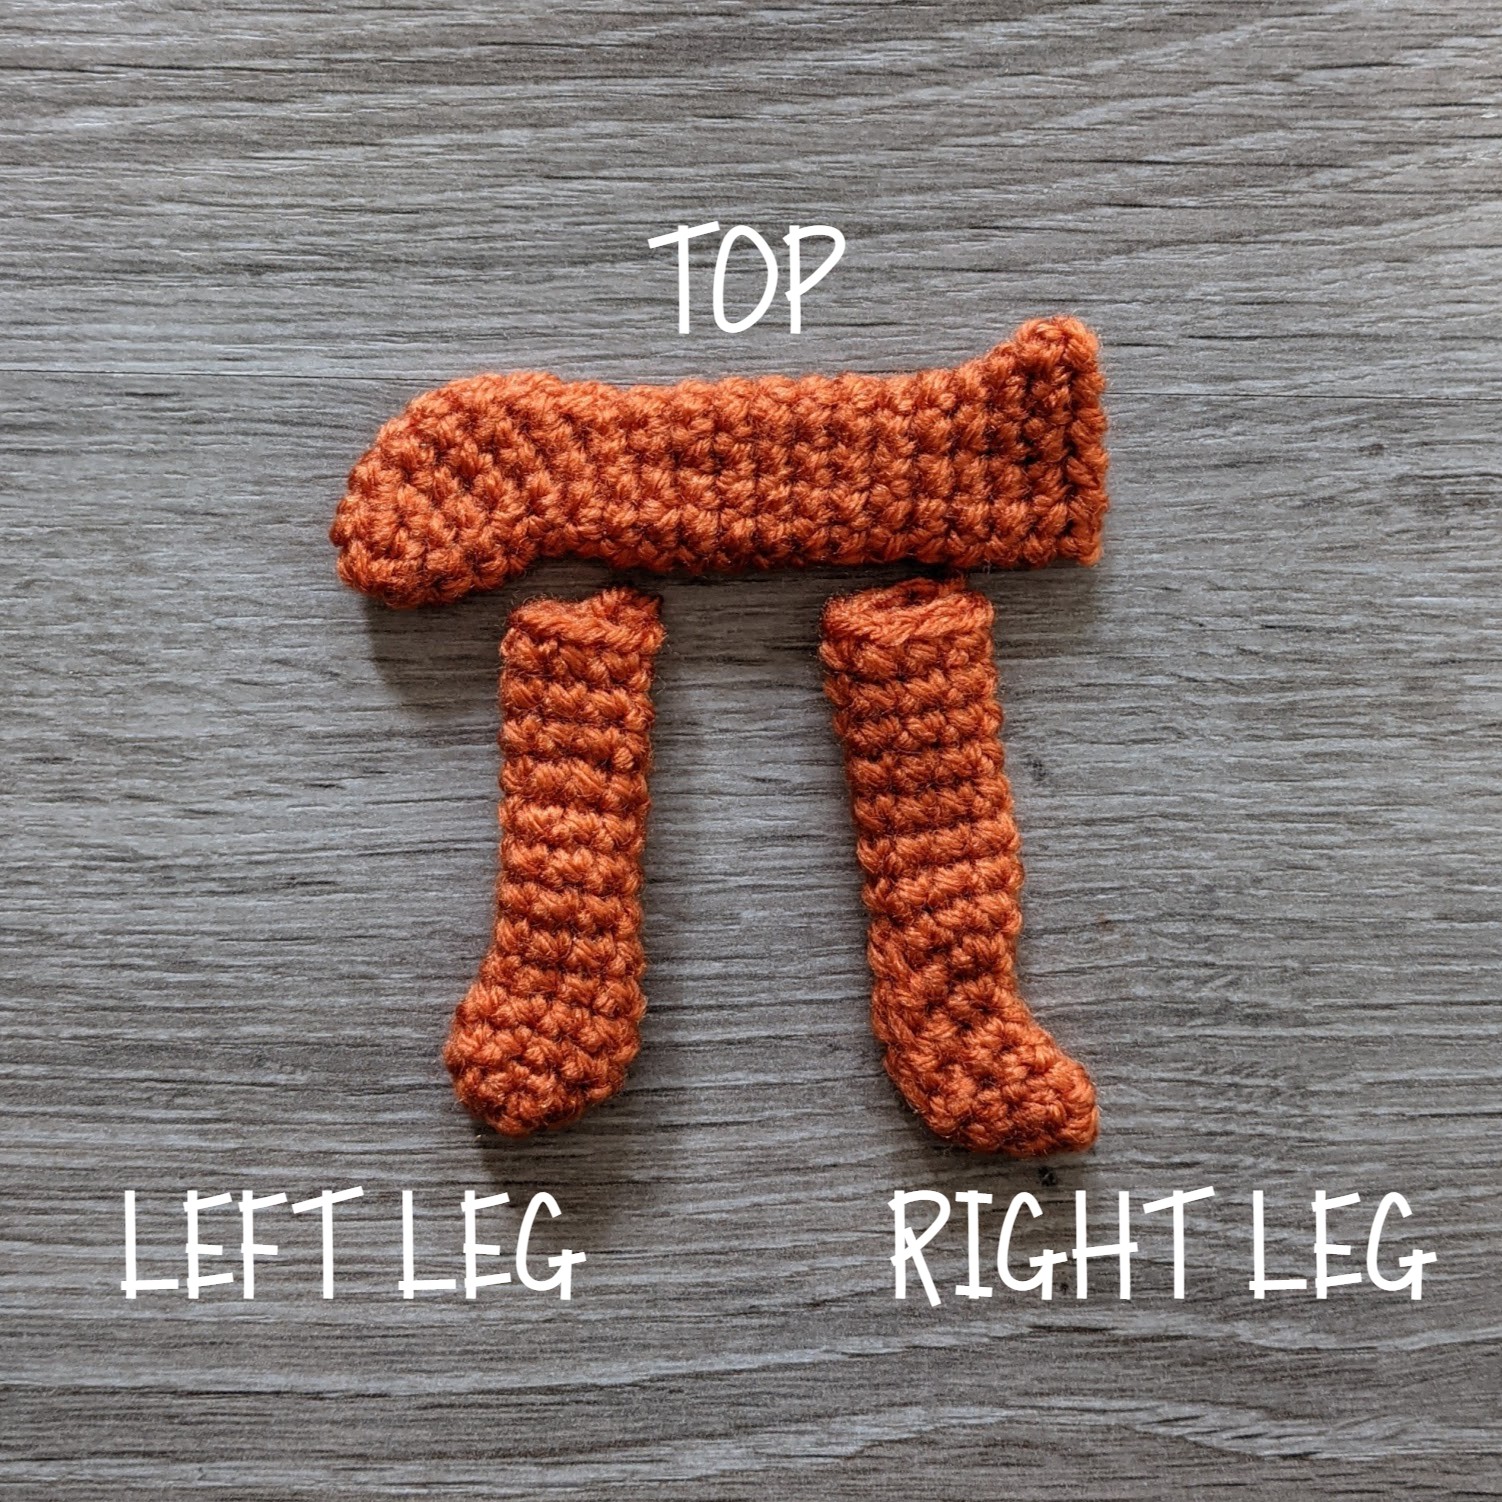
TOP
R1 sc 6 in magic ring (6)
R2 (sc 2, inc) two times (8)
R3 (sc 3, inc) two times (10)
R4 sc in each st around (10)
R5 inc, sc 8, inc (12)
R6-7 inc, sc 3, dec, dec, sc 3, inc (12)
R8 sc 4, dec, dec, sc 4 (10)
R9-17 sc in each st around (10)
R18 sc 3, inc, sc 2, inc, sc 3 (12)
R19 sc in each st around (12)
Finish with a sl st. Cut a long yarn tail for sewing. Flatten the piece and whip stitch the opening closed.
LEFT LEG
R1 sc 6 in magic ring (6)
R2 (inc, inc, sc 1) two times (10)
R3 sc in each st around (10)
R4 sc 3, dec, dec, sc 3 (8)
R5-13 sc in each st around (8)
Finish with a sl st. Cut a long yarn tail for sewing. Sew the left leg so that the top edge lies next to the curve of the top piece.
RIGHT LEG
R1 sc 6 in magic ring (6)
R2 sc 5, inc (7)
R3 sc 6, inc (8)
R4 inc, sc 6, inc (10)
R5-6 inc, sc 2, dec, dec, sc 2, inc (10)
R7 sc 3, dec, dec, sc 3 (8)
R8-14 sc in each st around (8)
Finish with a sl st. Cut a long yarn tail for sewing. Sew the right leg so that the top edge lines up with R13-17 of the top piece.

Love this!! Can’t wait to make it for my math teacher friend.
This is so cool. Love it. You do awesome designs.
I needed this, my eldest can reciet the first 20 or so numbers of Pi. They are going to love this. Thank you!