Support me on Ko-Fi and receive a complimentary PDF version of this pattern as a thank you!
Make sure to include your email address in the message box so that I can send you the pattern.

At the peak of the Pokémon craze (or just my crazed obsession) in the late 90’s, fans were eagerly awaiting the arrival of the second generation, Pokémon Gold and Silver. We were all curious about what kind of new Pokémon we were going to see in the new games, but the anime gave us a sneak peek at one Pokémon before the release of the second generation games.
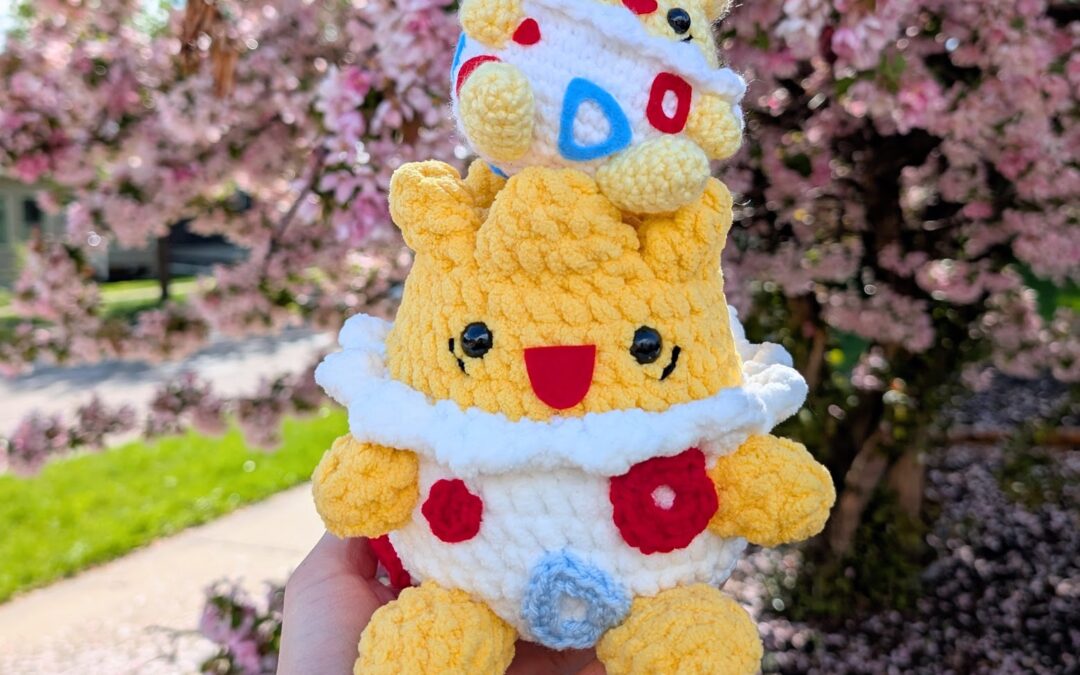
Togepi’s first appearance was as an egg in the episode Attack of the Prehistoric Pokémon, and was subsequently adopted by Misty upon hatching and imprinting on her. As a young and curious hatchling, Togepi would often wander and explore its surroundings, getting itself into trouble.
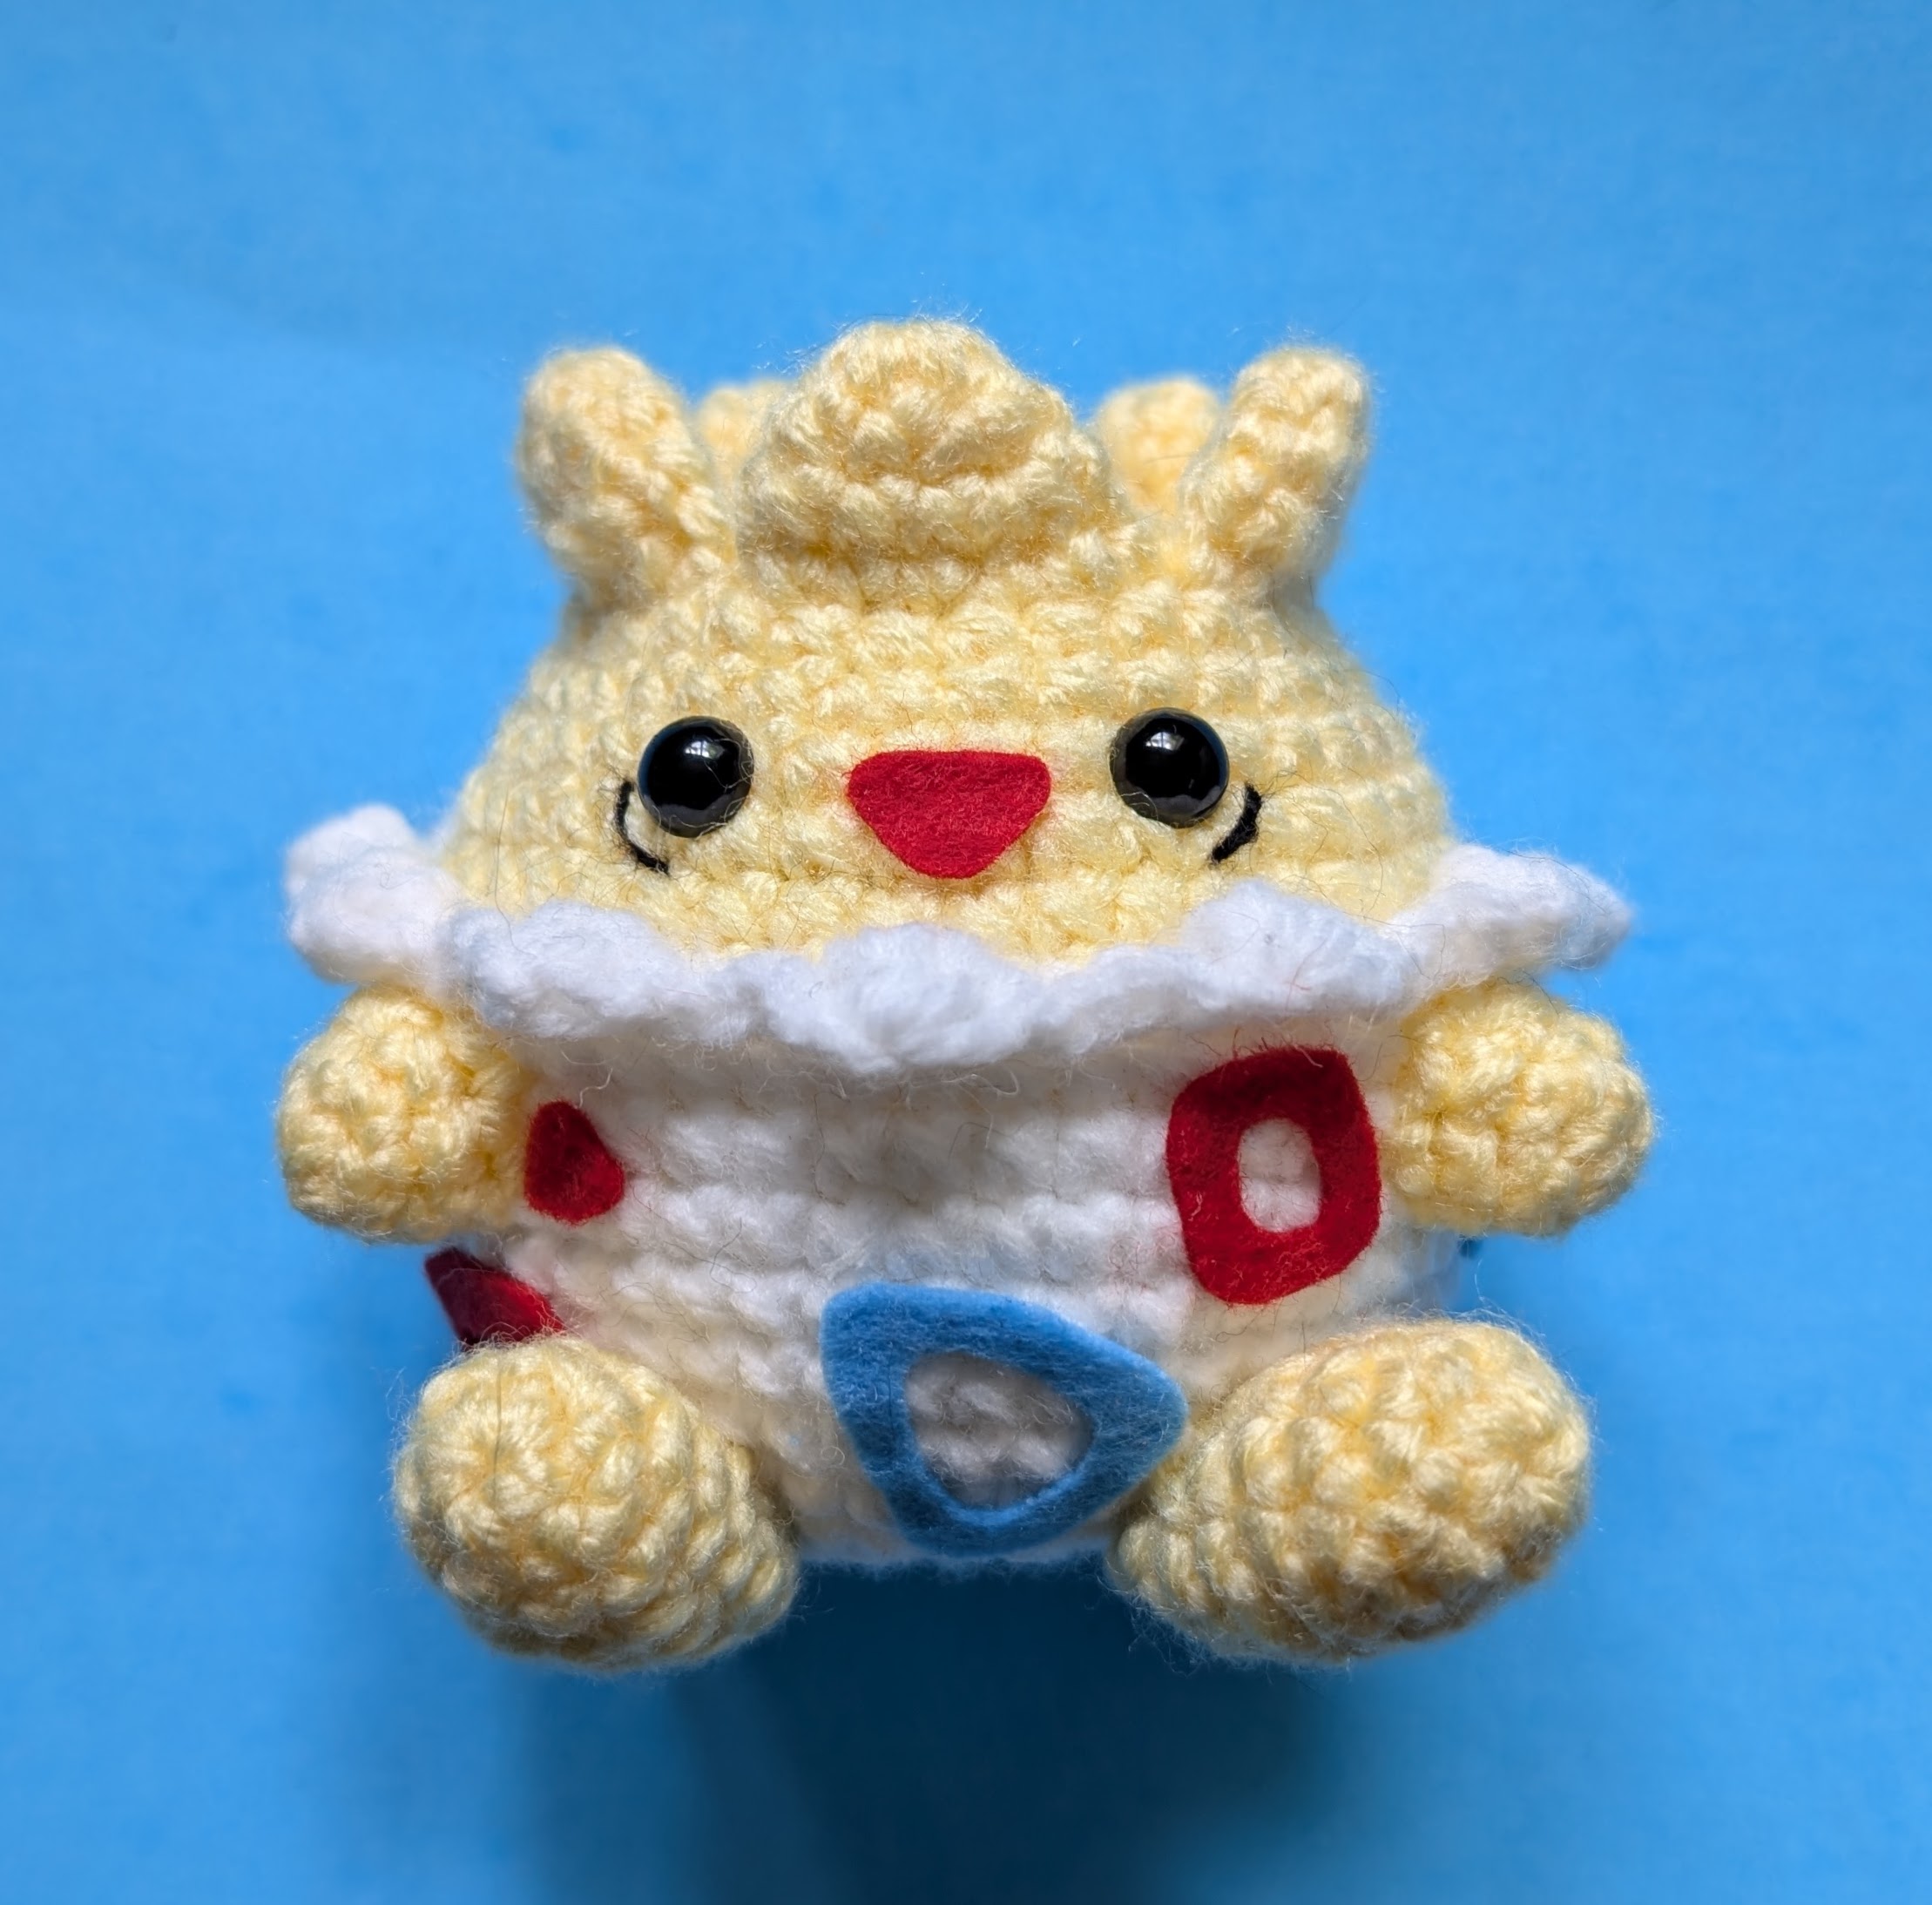
Pokémon Gold and Silver introduced the new breeding mechanic, in which the player can obtain eggs that hatch into baby Pokémon. Togepi is unique in that its design keeps its egg shell body along with the red and blue patterns. Its evolutions, Togetic and Togekiss, also incorporate the same patterns on their bodies.
For my Togepi pattern, I wanted to minimize the amount of sewing. The head points are crocheted along with the head, and the scalloped edge is crocheted into the front loops of the body after it has been completed. The only sewing involved are the arms and legs.
When decorating the body with Togepi’s egg shell patterns, you can cut out irregular polygon shapes out of felt and glue them to the body. If that sounds too tedious, you can also just embroider them out of red and blue yarn. The patterns are pretty random so you can decorate the body however you’d like!
If you support me on Ko-fi with any tip amount, I will send you a complimentary PDF version of the pattern, which will include lots of in-process photos and felt templates for the egg shell patterns. Make sure to include your email in the personal message box so that I can send you the PDF pattern. Thank you so much in advance for your support!
MATERIALS
– white, yellow, black worsted weight (4) yarn
– 4.0 mm crochet hook
– scissors
– yarn needle
– two 8.0 mm safety eyes
– red felt, blue felt, white glue
ABBREVIATIONS
ch – chain
st – stitch
sc – single crochet
sl st – slip stitch
inc – make 2 single crochet stitches into the same stitch
hdcinc – make 2 half double crochet stitches into the same stitch
dec – decrease over next two stitches (single crochet 2 stitches together)
BLO – crochet in the back loops only
HEAD POINTS (Make 5)
R1 With yellow, sc 6 in magic ring (6)
R2 (sc 1, inc) around (9)
R3 (sc 1, inc, sc 1) around (12)
Finish with a sl st. Cut a short yarn tail and weave in. Flatten each head point. The bottom of each point will be joined when crocheting the head.
HEAD/BODY
R1 With yellow, sc 8 in magic ring (8)
R2 inc around (16)
R3 (sc 1, inc) around (24)
R4 (sc 3, inc) around (30)
In the next round, crochet through the head points (there are 6 matching front and back points on each head point) and the stitches from R4 at the same time.

R5 sc 6 to attach the first head point, sc 6 to attach the second head point, continue for the third, fourth, and fifth head points (30)
R6 sc around (30)
R7 (sc 4, inc) around (36)
R8 sc around (36)
R9 (sc 5, inc) around (42)
R10 sc around (42)
R11 With white, (sc 6, inc) around (48)
R12 In BLO, sc around (48)
R13-16 sc around (48)
Insert the safety eyes below R9, and six stitches apart. The safety eyes should be placed on either side of the front head point.
Cut two long lengths of black yarn and embroider two angled lines under the corner of each eye.
 R17 (sc 4, dec) around (40)
R18 sc around (40)
R19 (sc 3, dec) around (32)
R20 (sc 2, dec) around (24)
R21 (sc 2, dec) around (18)
R22 dec around (9)
Finish with a sl st. Cut a short yarn tail. Stuff the body and then sew the opening closed.
For the scalloped edging around the neck, you will be crocheting into the front loops of R12.
With white yarn, insert the hook underneath the front loop of a stitch on R12 starting at the back of the body.
Scalloped edge pattern repeat: (sc 1, hdcinc, sc 1, sl st 1) ten times
Cut a short yarn tail and weave in the ends.
ARMS
R1 With yellow, sc 6 in magic ring (6)
R2 (sc 1, inc, sc 1) around (8)
Finish with a sl st. Cut a short yarn tail. Lightly stuff the arms.
Sew the arms to the body underneath the scalloped edging.
FEET
R1 With yellow, sc 6 in magic ring (6)
R2 (inc, inc, sc 1) around (10)
R3-4 sc around (10)
R5 (sc 3, dec) around (8)
R6 (sc 2, dec) around (6)
Finish with a sl st. Cut a short yarn tail. Stuff the feet.
Sew the feet to the body so that Togepi can sit balanced.
For the felt details, cut a semi-circle for the mouth out of red felt. Glue the mouth between the eyes.
For the shape patterns on the body, cut out irregular square, diamond, triangle shapes out of red and blue felt. Then glue each shape to the body in whatever pattern you like.
You have completed your Togepi! Make sure you share your completed project by tagging @sirpurlgrey on Instagram!