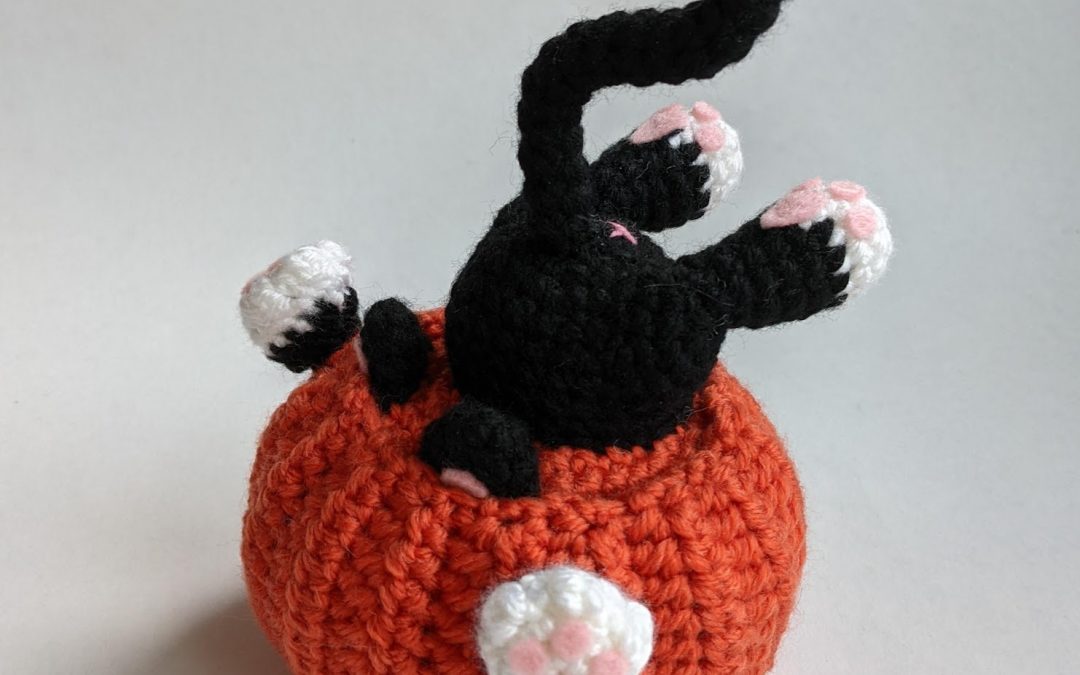
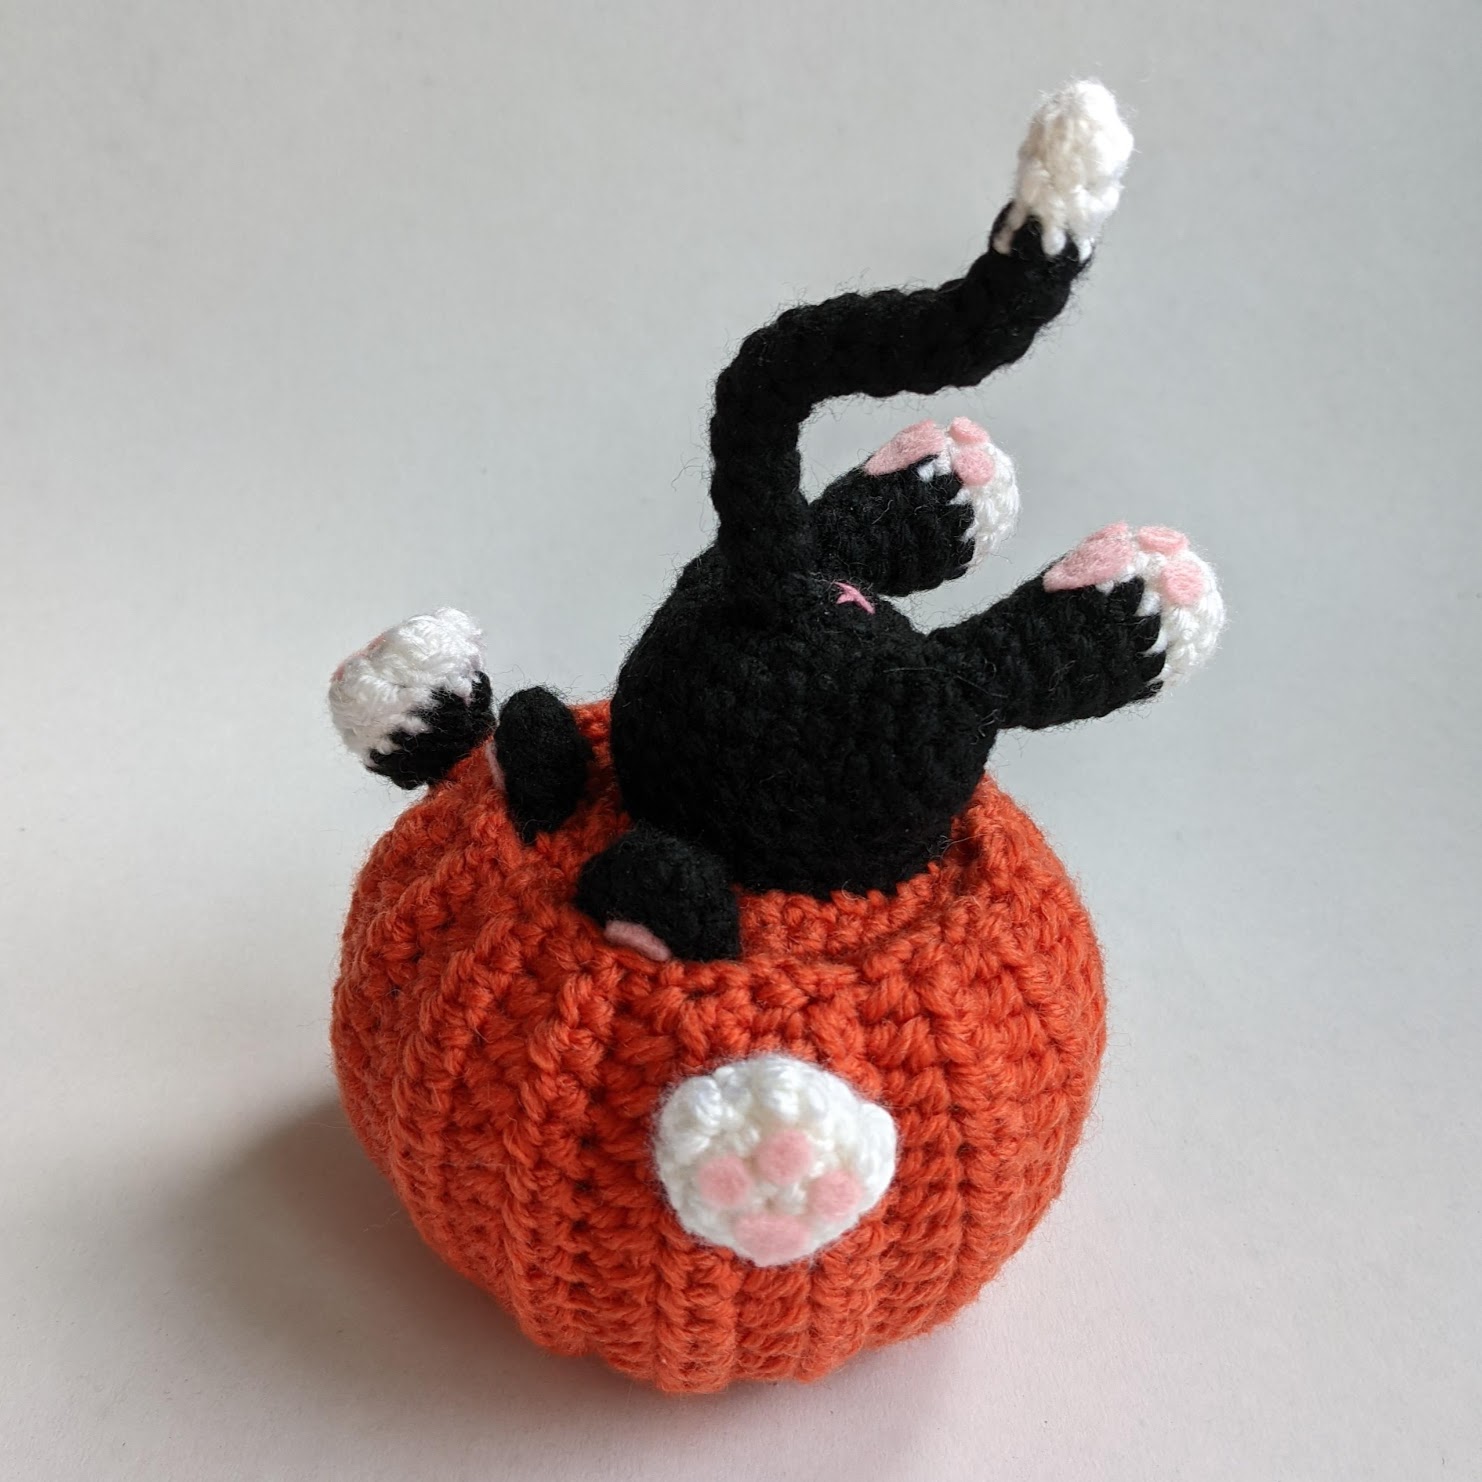
This piece was inspired by my parents’ cat Max. There is a small section in my parents’ garden where they grew a pumpkin patch and Max loves jumping in and out of it. As I watched him frolic among the pumpkin leaves, I imagined if a cat would jump into a hollow pumpkin as you were trying to carve it, just like how cats love hopping into empty boxes. This image in my head was too cute to not try and crochet an amigurumi version of it.
In the first part of this crochet along pattern, you will be crocheting and assembling the pumpkin, and the base inside the pumpkin that the cat is “jumping” into. For the pumpkin, you just need to know how to single crochet and half-double crochet (US terms). For the base, there will be rounds where you are working into the back loops in order to form the cylindrical shape.
In Part 2 of the crochet along pattern, you will be crocheting all the cat pieces and then assembling them to the pumpkin base.
MATERIALS/TOOLS
Yarns – orange (O), black (B), white (W), pink (P), green (G)
scissors
pink felt
polyester fibrefill
tacky (fabric) glue [I use glue from Aleene’s]
size 6 (4.0 mm) crochet hook [I use hooks from Laurel Hill]
yarn needle [I use the bent tip needles from Clover]
handheld hole punch [similar to this one from Amazon]
ABBREVIATIONS
ch = chain
st = stitch
sc = single crochet
hdc = half double crochet
sl st = slip stitch
inc = single crochet 2 into the same stitch
dec = decrease over next two stitches (single crochet 2 stitches together or use invisible decrease)
BLO = crochet into the back loops only
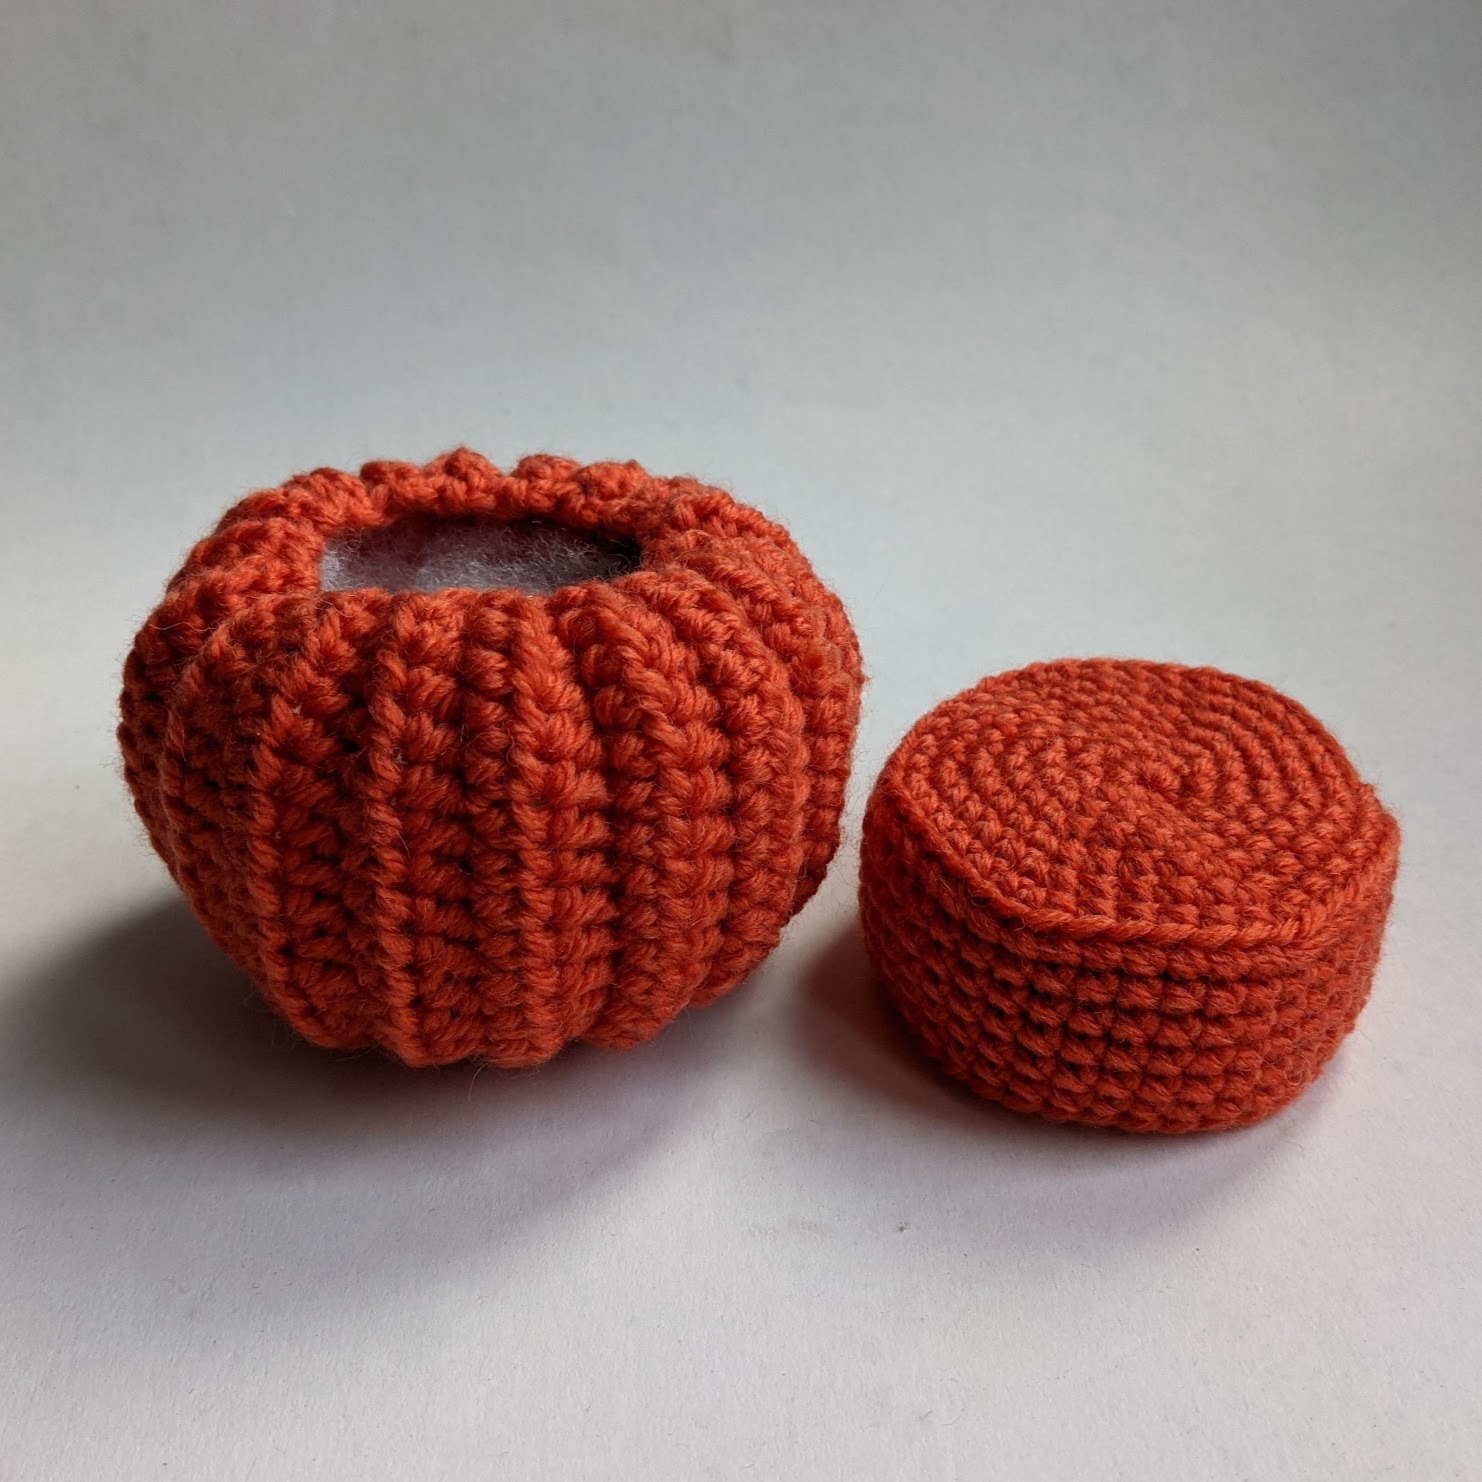
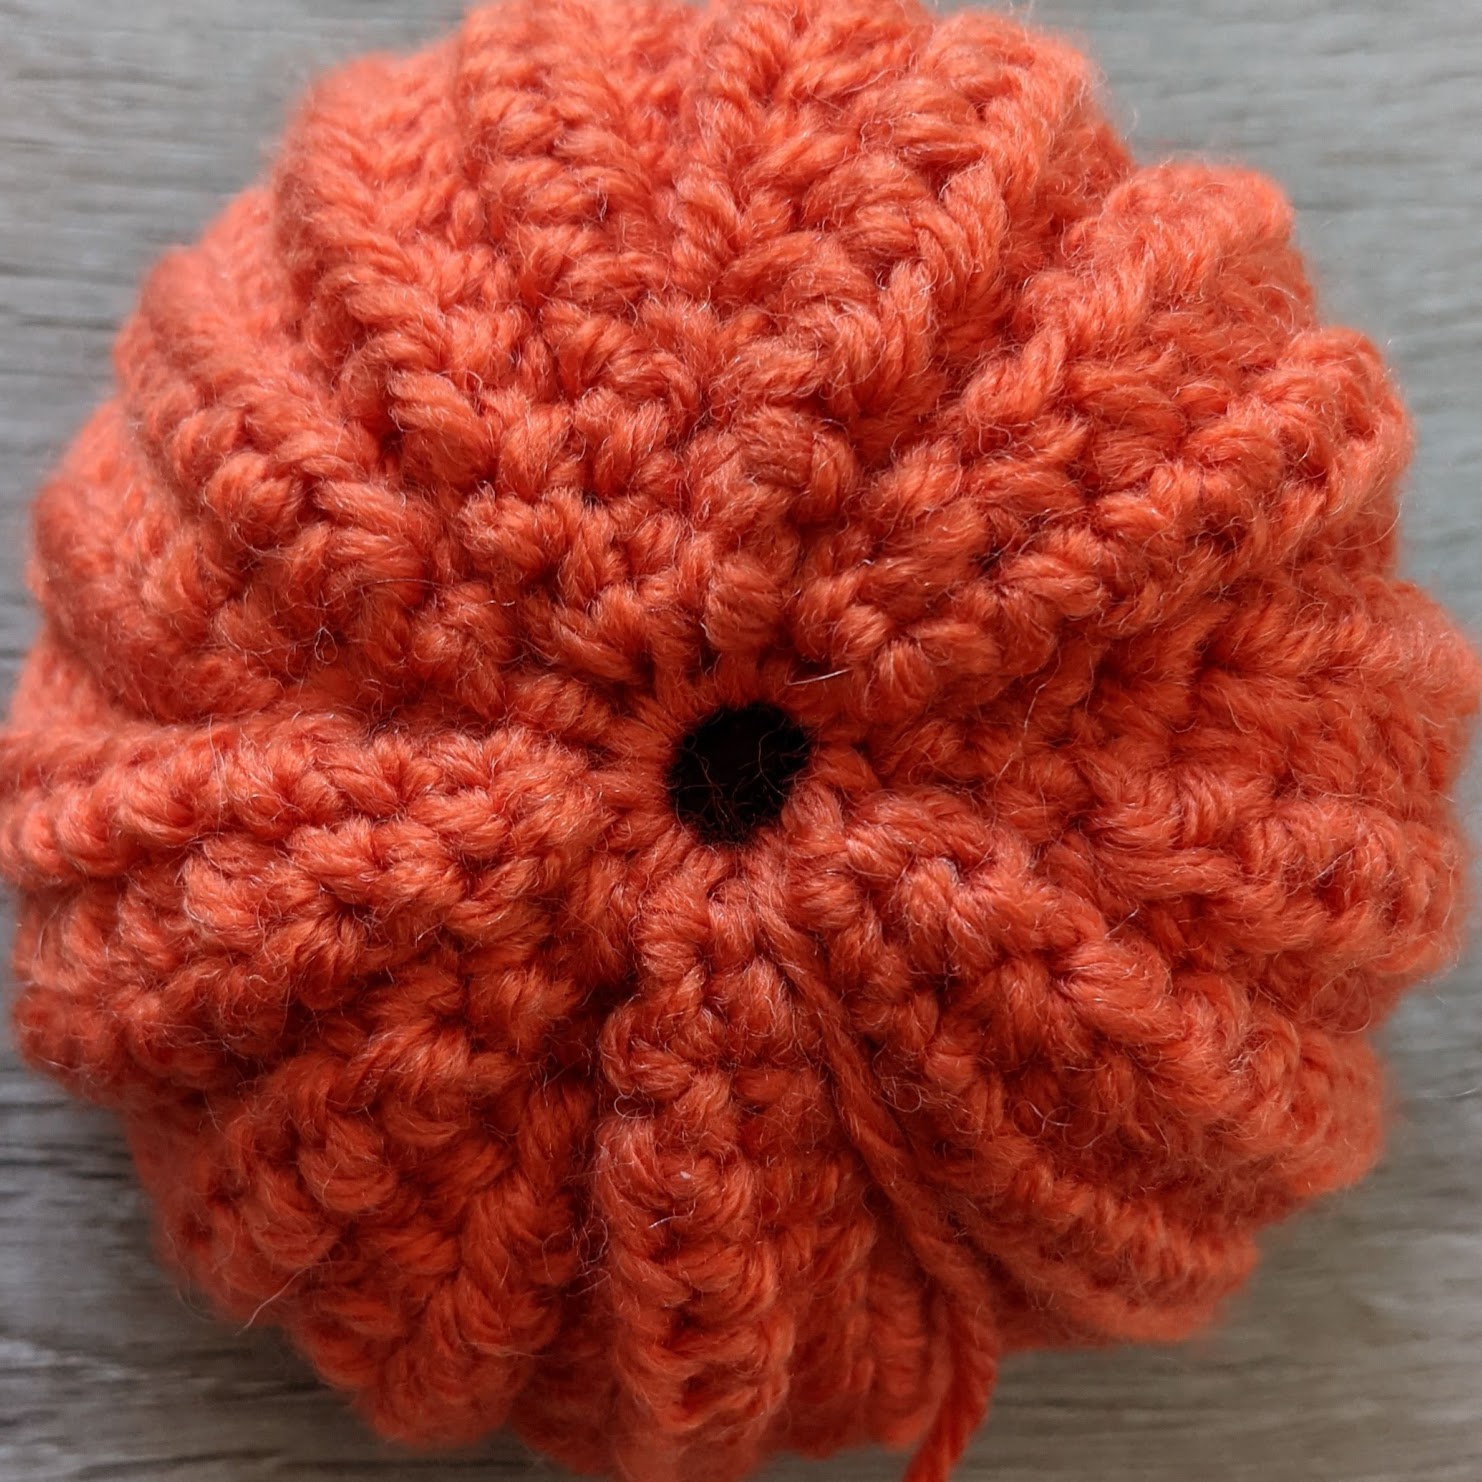
PUMPKIN
The pumpkin is worked in rows.
With orange (O), chain 19.
R1-36 Skip first chain, sc 2, hdc 14, sc 2, ch 1 and turn
Fold the piece in half so that the edges meet, and match up the stitches along the edges. In the next row, you will be crocheting into both sides at the same time.
Skip first chain, sl st 18.

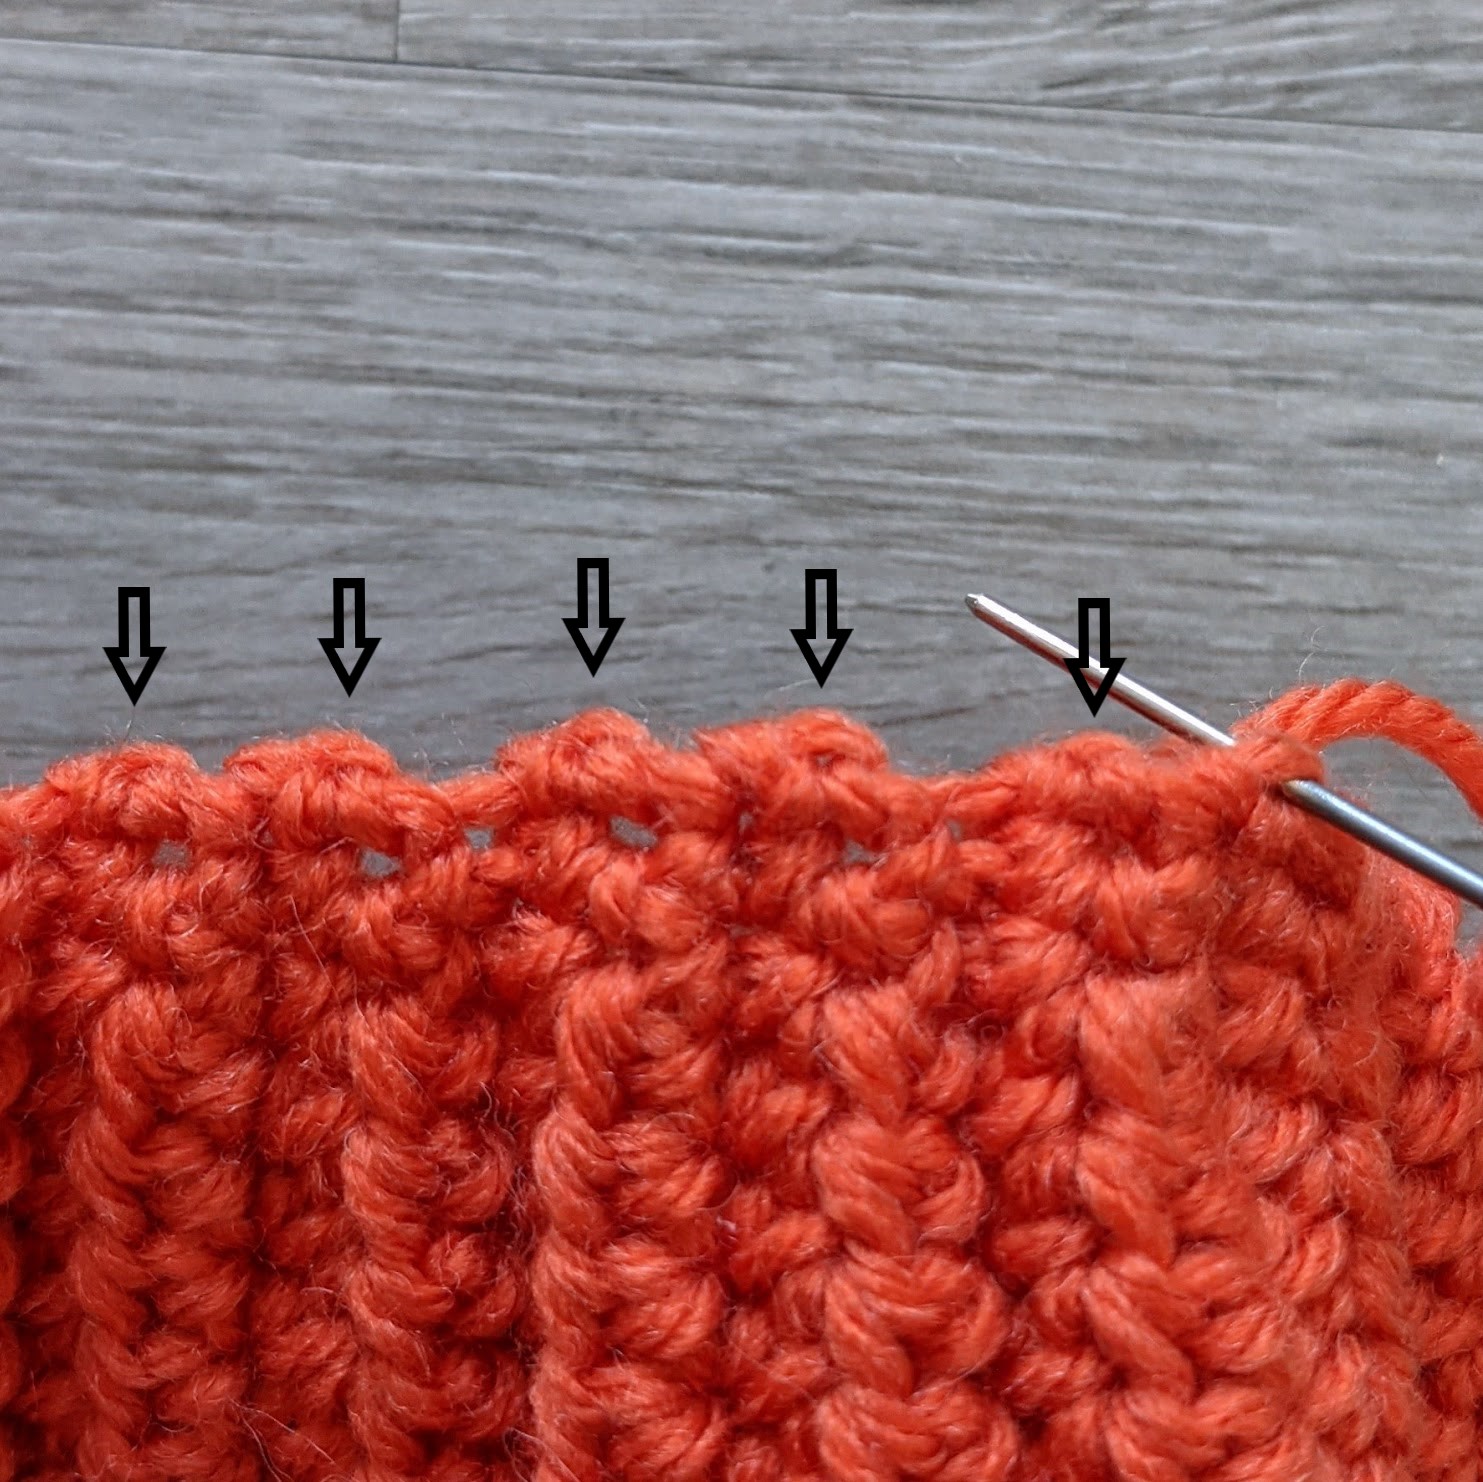
Fasten off. Cut a long yarn tail for sewing.
Thread a yarn needle with the yarn tail and insert the needle into the stitches along the edge of the opening. Once you have gone all the way around, pull on the yarn tail to close up the opening. It does not have to be closed entirely as it will be covered up with the bottom green piece.
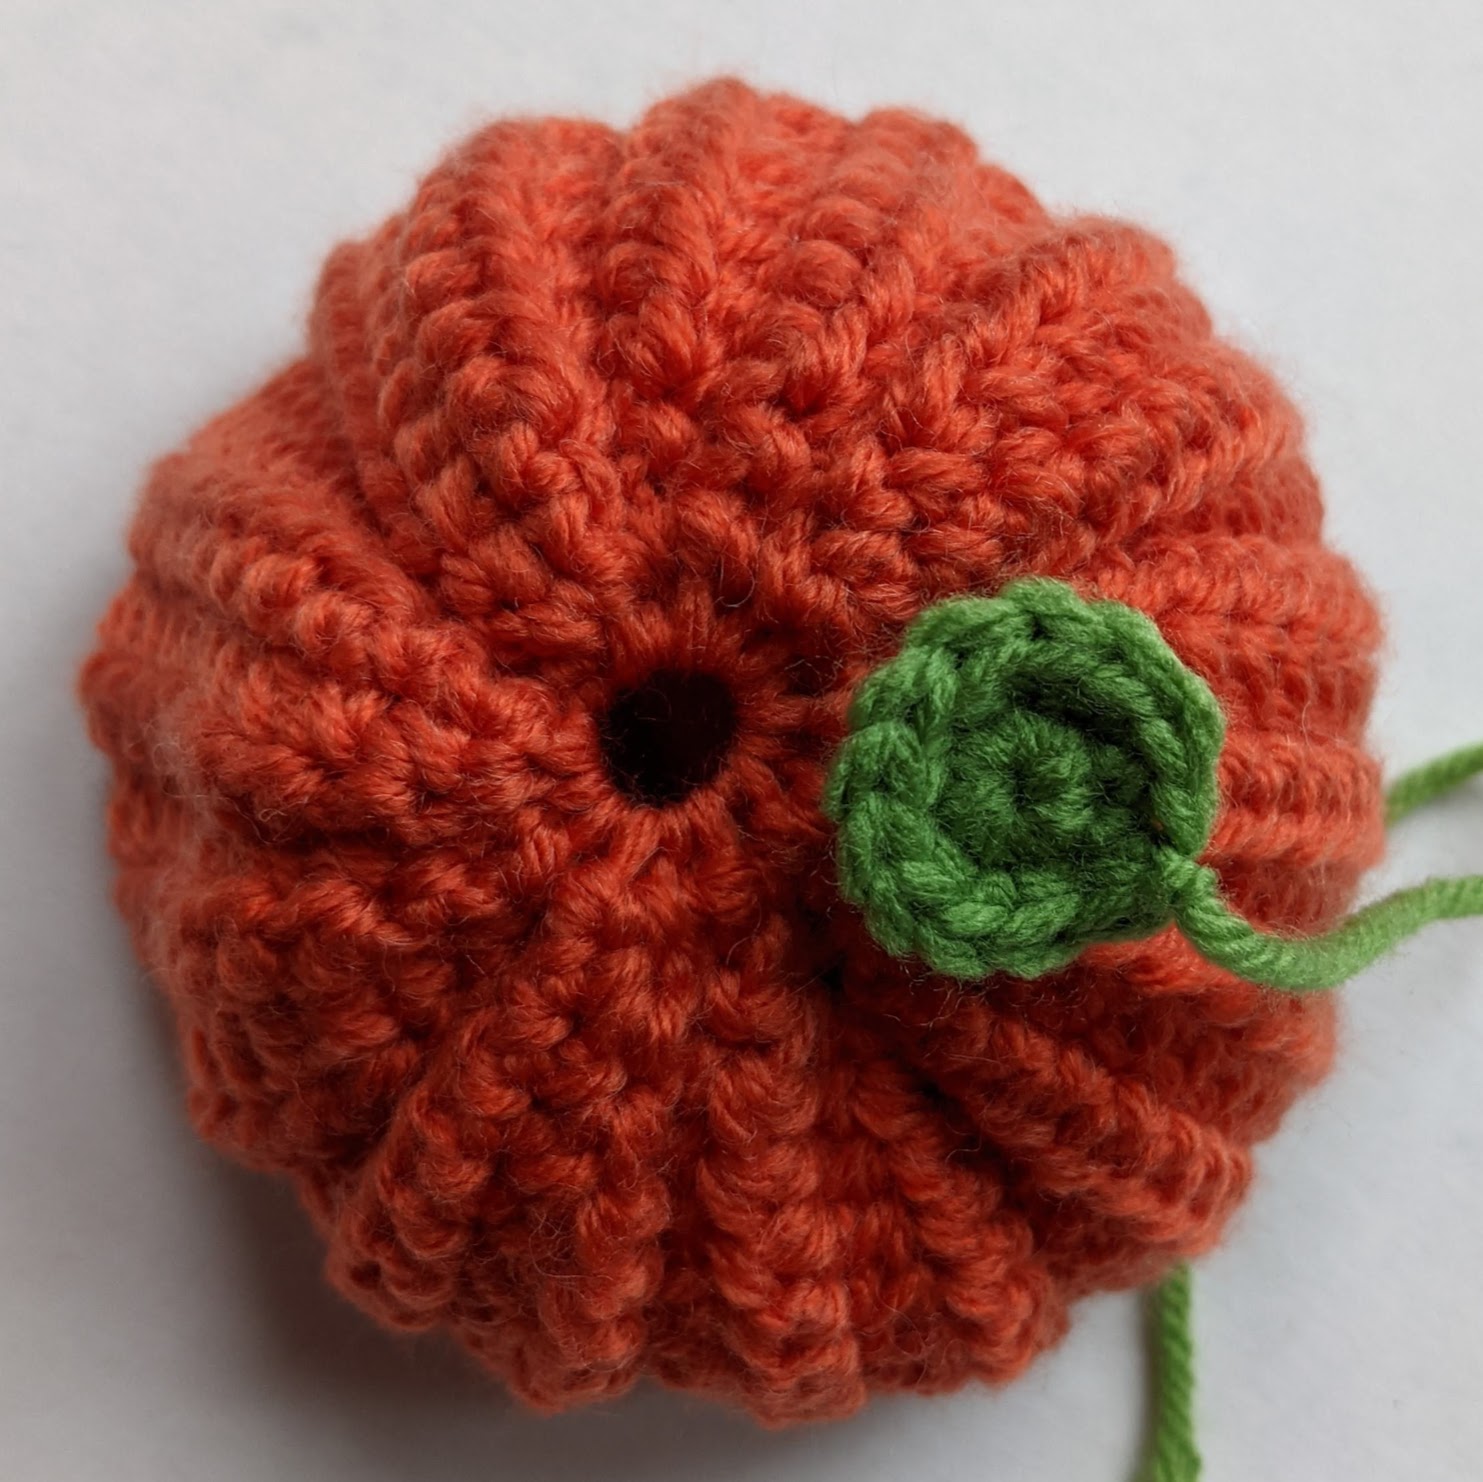
PUMPKIN BOTTOM PIECE
R1 With green (G), sc 6 in magic ring (6)
R2 inc in each st around (12)
Finish with a sl st into the next stitch. Cut a long yarn tail for sewing.
Place the piece over the bottom opening of the pumpkin and sew it to the pumpkin.
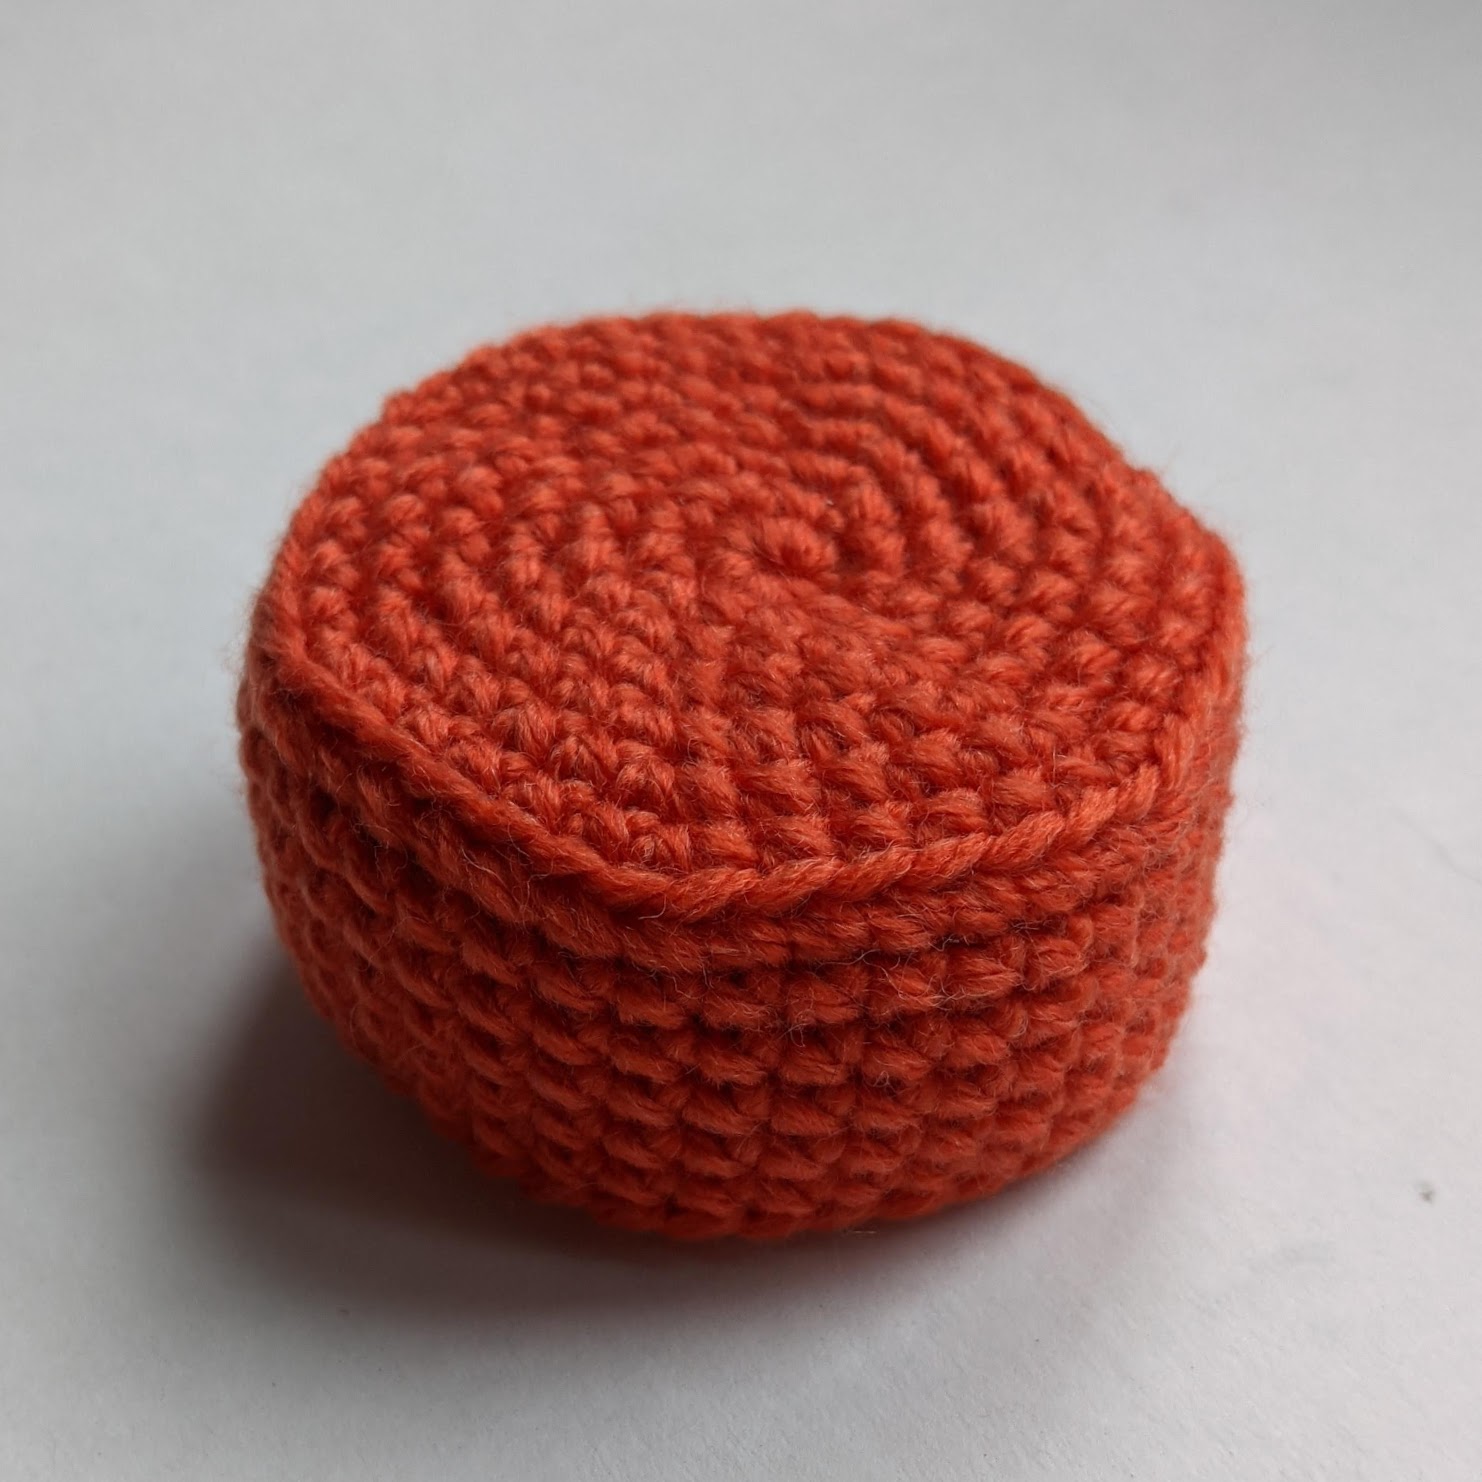
INSIDE BASE
R1 With orange (O), sc 6 in magic ring (6)
R2 inc in each st around (12)
R3 (sc 1, inc) six times (18)
R4 (sc 2, inc) six times (24)
R5 (sc 3, inc) six times (30)
R6 (sc 4, inc) six times (36)
R7 (sc 5, inc) six times (42)
R8 In BLO, sc in each st around (42)
R9-13 sc in each st around (42)
R14 In BLO, sc in each st around (42)
R15 (sc 5, dec) six times (36)
R16 (sc 4, dec) six times (30)
R17 (sc 3, dec) six times (24)
R18 (sc 2, dec) six times (18)
R19 (sc 1, dec) six times (12)
R20 dec six times (6)
Finish with a sl st into the next stitch. Cut a long yarn tail for sewing. Stuff the base with polyfill and sew the opening closed.

Can’t wait for the next part! 😄
Enjoyed making part 1. Looking forward to part 2